For a weirdly long time, I thought my filming problem was that I didn’t own “proper creator gear.” I’m a media studies student in London, so my days are basically lectures, library stops, train platforms, and random café corners with five minutes to film something before I need to run again. What was actually wrecking me wasn’t a lack of expensive equipment. It was bulk. If a setup doesn’t fit in one commuter backpack and come out fast on a packed day, I’m not using it.
I wanted a budget campus filming kit that could handle quick talking clips, café B-roll, voiceovers, and the occasional piece-to-camera without making me look like I was hauling a mini film studio through the Victoria line. After a lot of trial and error, this is the compact kit I’ve ended up actually carrying.
What I had to fix before buying anything
Before pulling out my card, I had to be honest about what was broken in my workflow. It came down to four things.
First, my audio was inconsistent. London is loud. Buses, espresso machines, station announcements, group work in the background — all of it makes phone audio sound rough fast.
Second, my footage looked shakier than it felt while filming. When you’re recording between classes or walking to a bus stop, your hands are doing more than you think.
Third, my lighting was always the thing that made clips look cheap. Not because my phone camera was bad, but because campus lighting is deeply unflattering. Lecture halls are dim, cafés are backlit, and winter afternoons in London disappear at about 3:47 PM.
And fourth, my bag was chaos. Cables, adapters, SD cards, lip balm, receipts, chargers — everything ended up in one pocket, and then I’d spend two full minutes digging around while pretending I was still “quickly setting up.”
So my rules became simple: every item had to be lightweight, useful in multiple places, and cheap enough that I didn’t feel sick adding it to my student budget. If a product solved only one tiny problem and took up loads of space, it was out. That’s basically the same mindset I used in my London coffee day setup too — portability matters more than fantasy “perfect setups” you never carry.
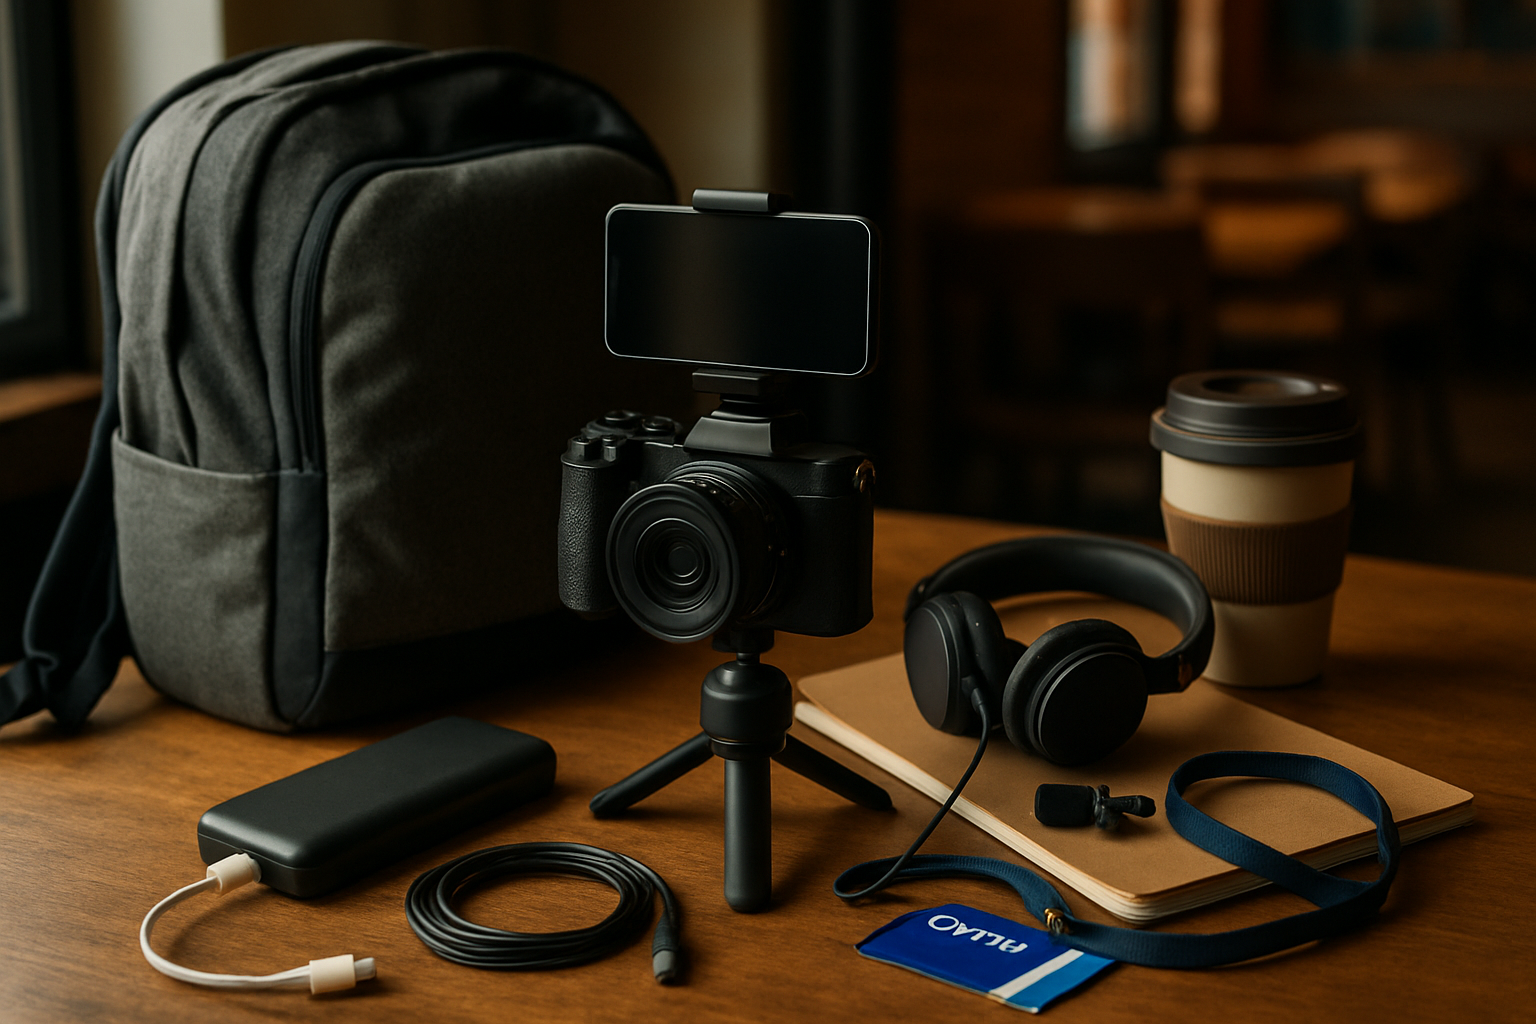
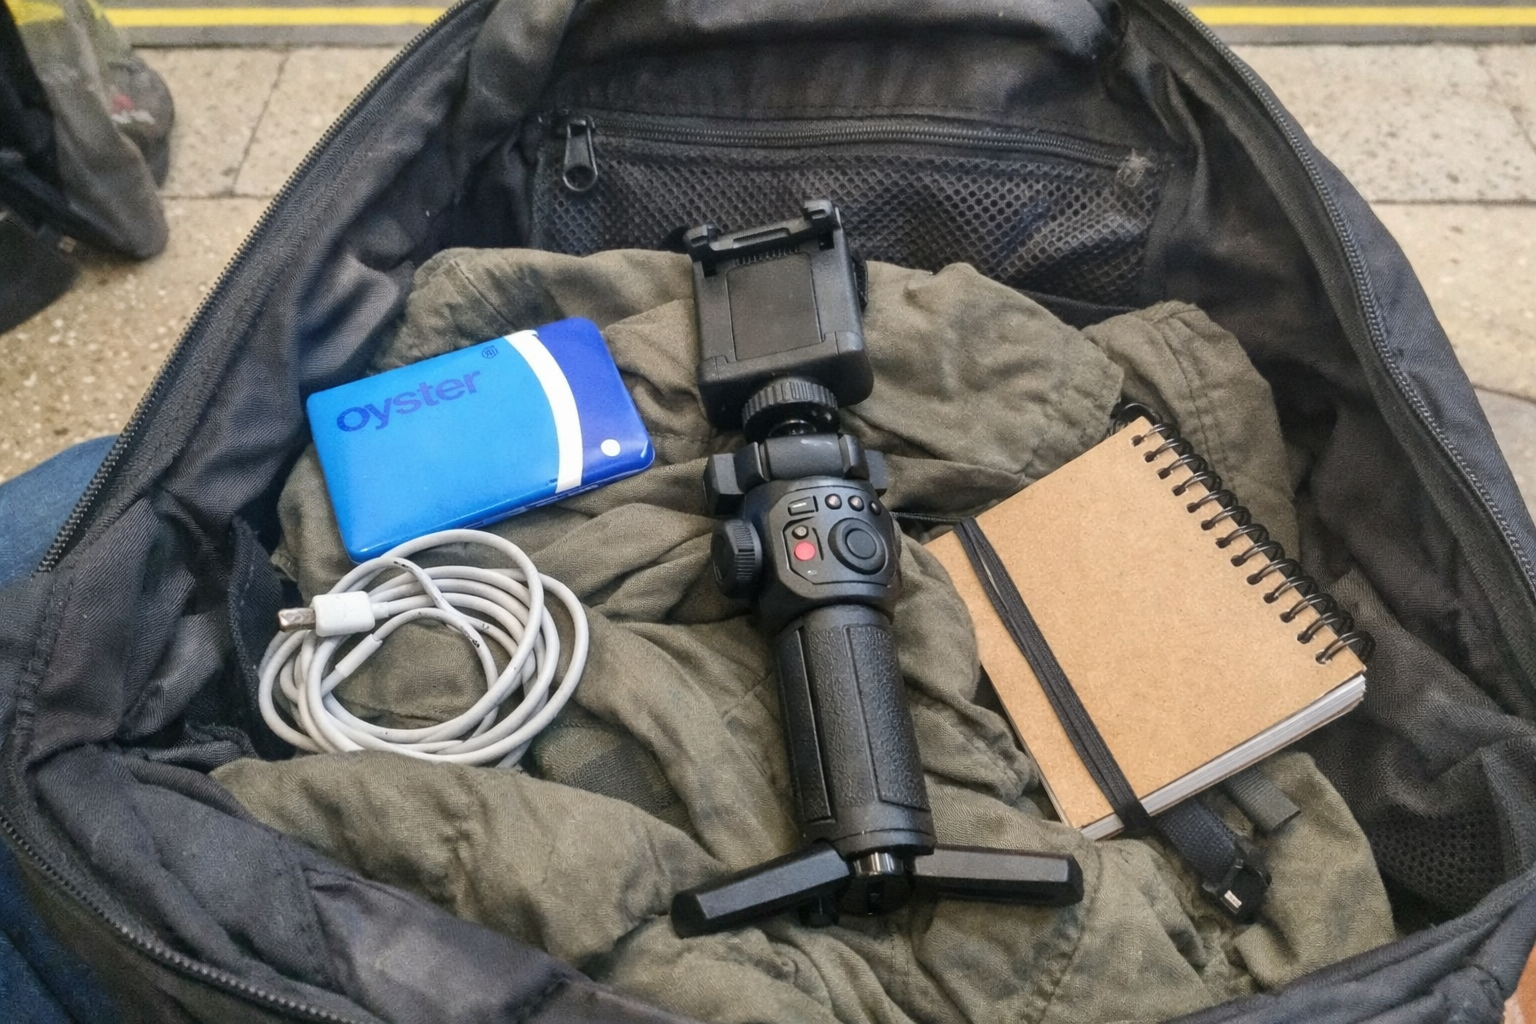
The filming kit I actually keep in my commuter backpack
TELESIN C03 Magnetic Selfie Light
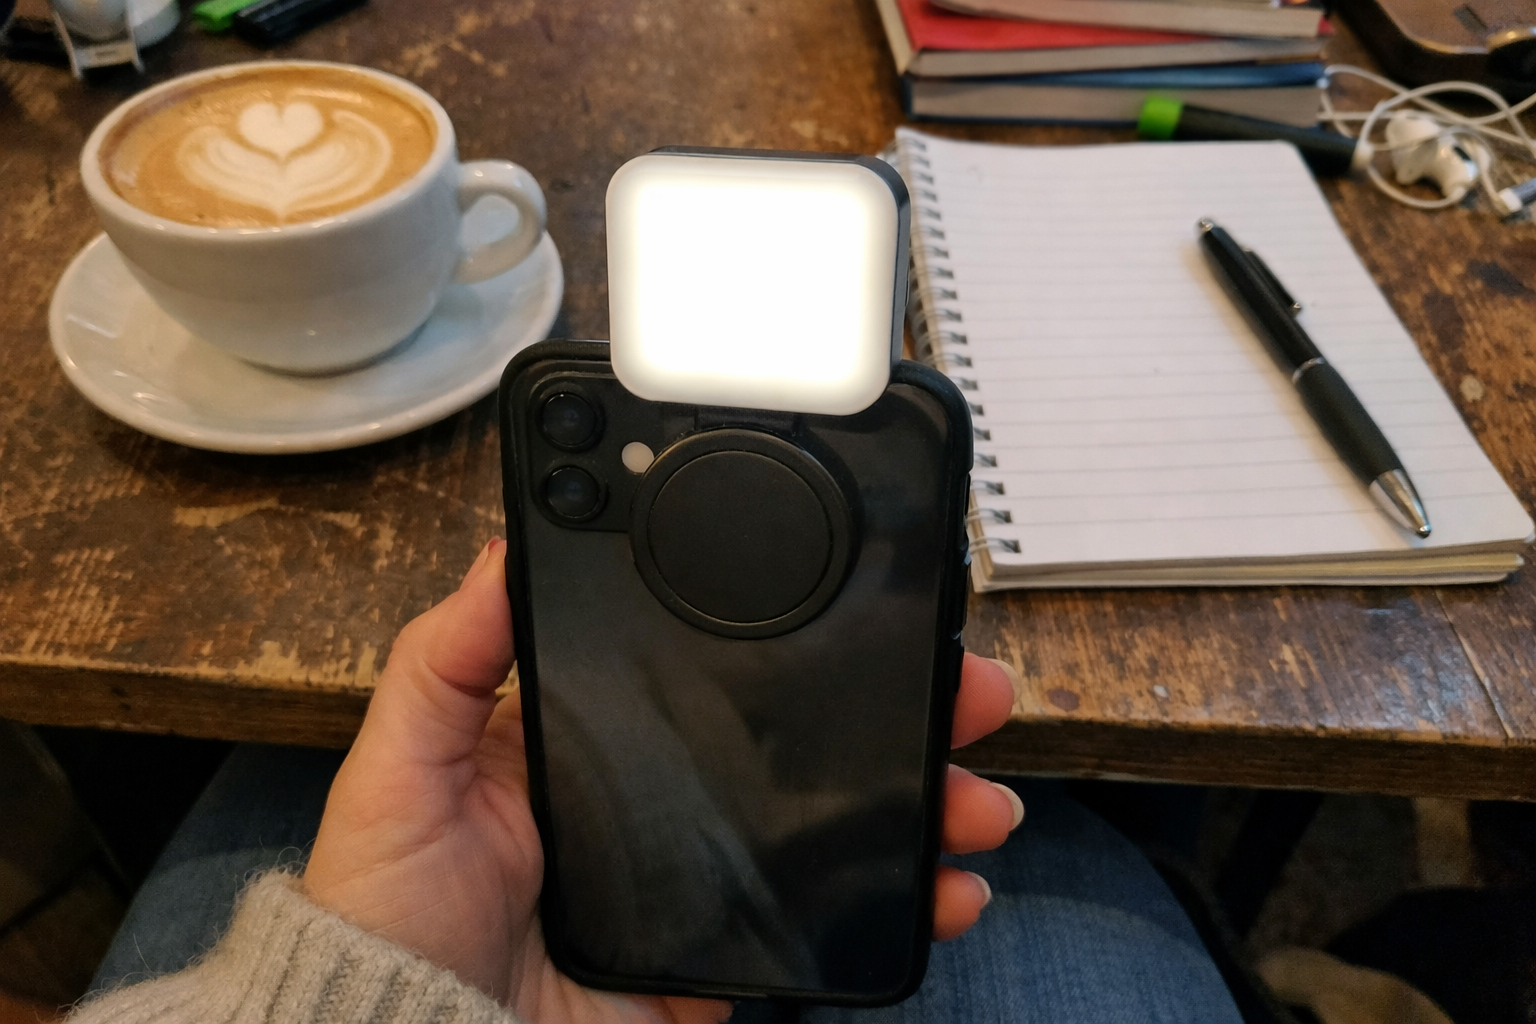
This is one of those tiny accessories that makes a bigger difference than it should. I picked up the TELESIN C03 Magnetic Selfie Light because I was tired of looking grey and underlit in lecture buildings and gloomy cafés. What I like is that it’s small enough to live in my bag without needing its own whole pouch, and the magnetic attachment makes it genuinely quick to use. I don’t want to build a rig just to film a 20-second clip between seminars. The adjustable brightness and different colour temperatures also help when I’m moving between daylight, fluorescent indoor light, and those warm coffee shop corners that make everything go orange.
What I Appreciate
- ✅ Actually helps in bad campus lighting without taking up much space
- ✅ Magnetic setup is fast, which matters when I’m filming on the go
- ✅ The rotating design is handy for both selfie clips and quick product shots
What Frustrates Me
- ❌ It’s great for close-up phone filming, but it won’t light a whole room
- ❌ If you already hate attaching extra things to your phone, this may still feel fiddly
Ergonomic Anti-Falling Vlogging Hand Grip
I know a phone grip sounds very “extra,” but this was one of the best bang-for-your-buck additions in my kit. I started using the Ergonomic Anti-Falling Vlogging Hand Grip after realising my footage always looked more chaotic than I expected, especially when filming outdoors or trying to talk while walking. It gives me a more secure hold, keeps my fingers away from the lens, and makes filming for longer stretches less annoying. I also like that it has a mount for adding a light or mic, so it doesn’t feel like a one-trick item.
What I Appreciate
- ✅ Makes handheld clips look steadier without needing a bulky gimbal
- ✅ Easier on my hands during longer filming sessions
- ✅ Works in both portrait and landscape, which is useful for class and social content
What Frustrates Me
- ❌ It still won’t replace a motorized stabilizer for very smooth walking shots
- ❌ Slightly awkward to shove into a totally overpacked bag
ULANZI MT-08 Extension Pole Tripod
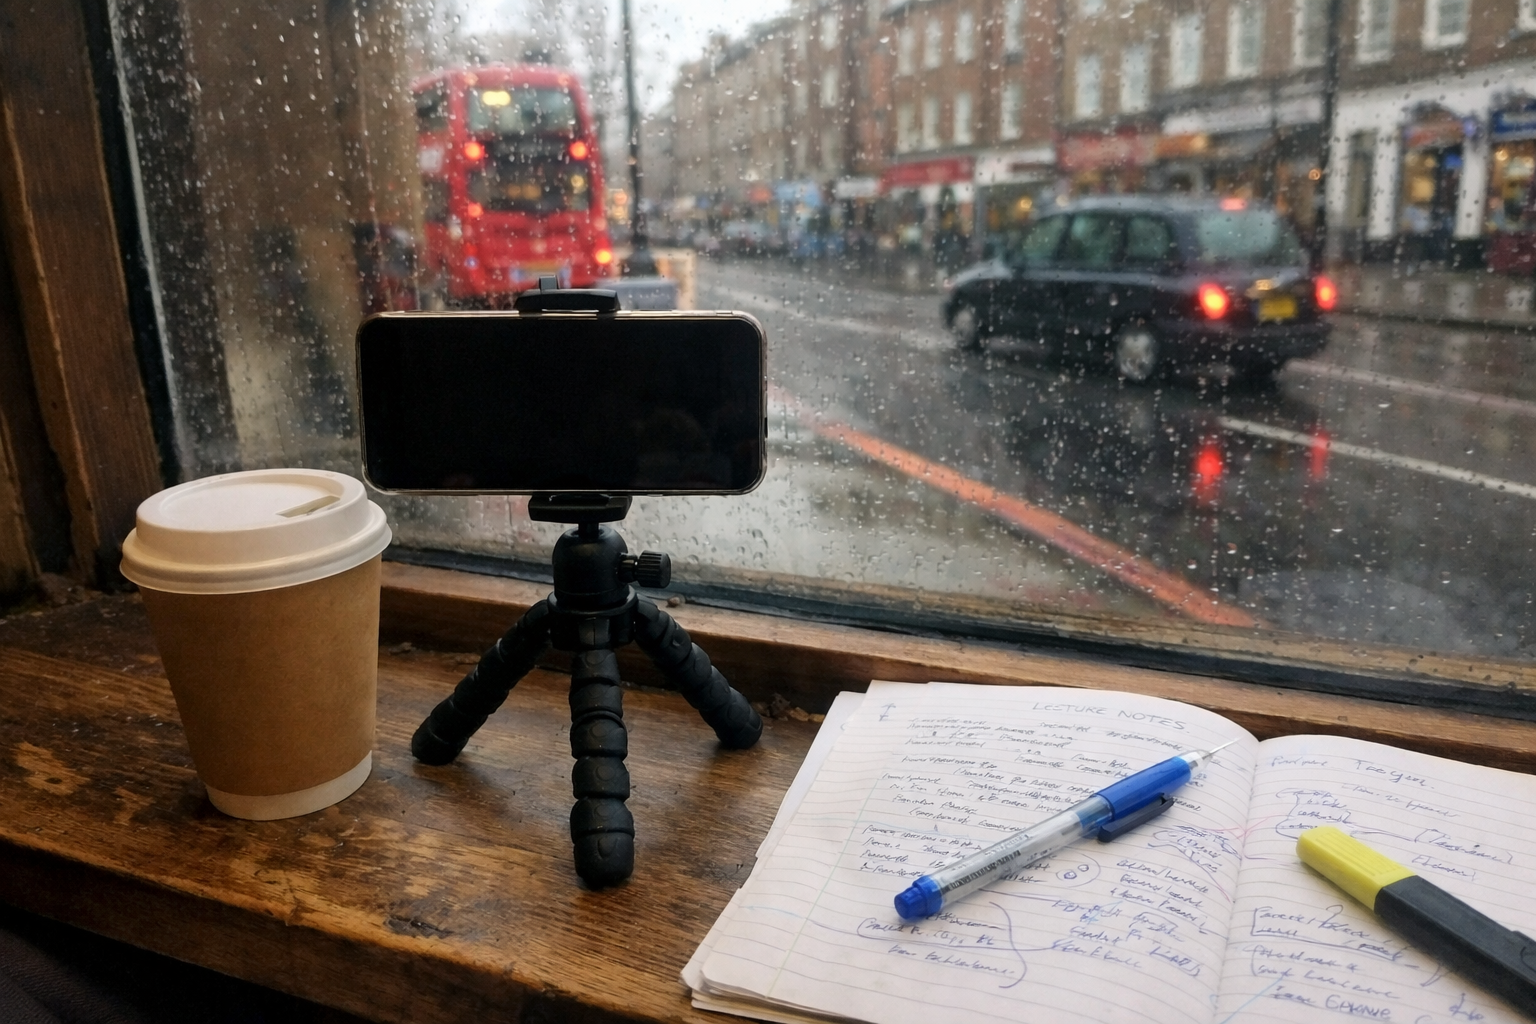
If I had to cut this list down hard, I’d still keep the ULANZI MT-08 Extension Pole Tripod. It’s one of the most useful small creator tools I own because it works as a tripod, short extension pole, and grip. That matters on campus because I’m constantly filming in places where there isn’t much room. I can set it on a table in a café, use it for a quick static clip in the library corner, or hold it as a little extension handle outdoors. It’s compact enough that I don’t resent carrying it, which is honestly half the battle.
What I Appreciate
- ✅ Tiny and light enough for daily carry
- ✅ Useful in multiple filming situations, so it earns its backpack space
- ✅ Feels more stable than a lot of super-cheap mini tripods
What Frustrates Me
- ❌ The extension is modest, so don’t expect huge reach
- ❌ Best for lightweight setups, not giant add-ons
Luxtude Electronics Organizer Travel Case
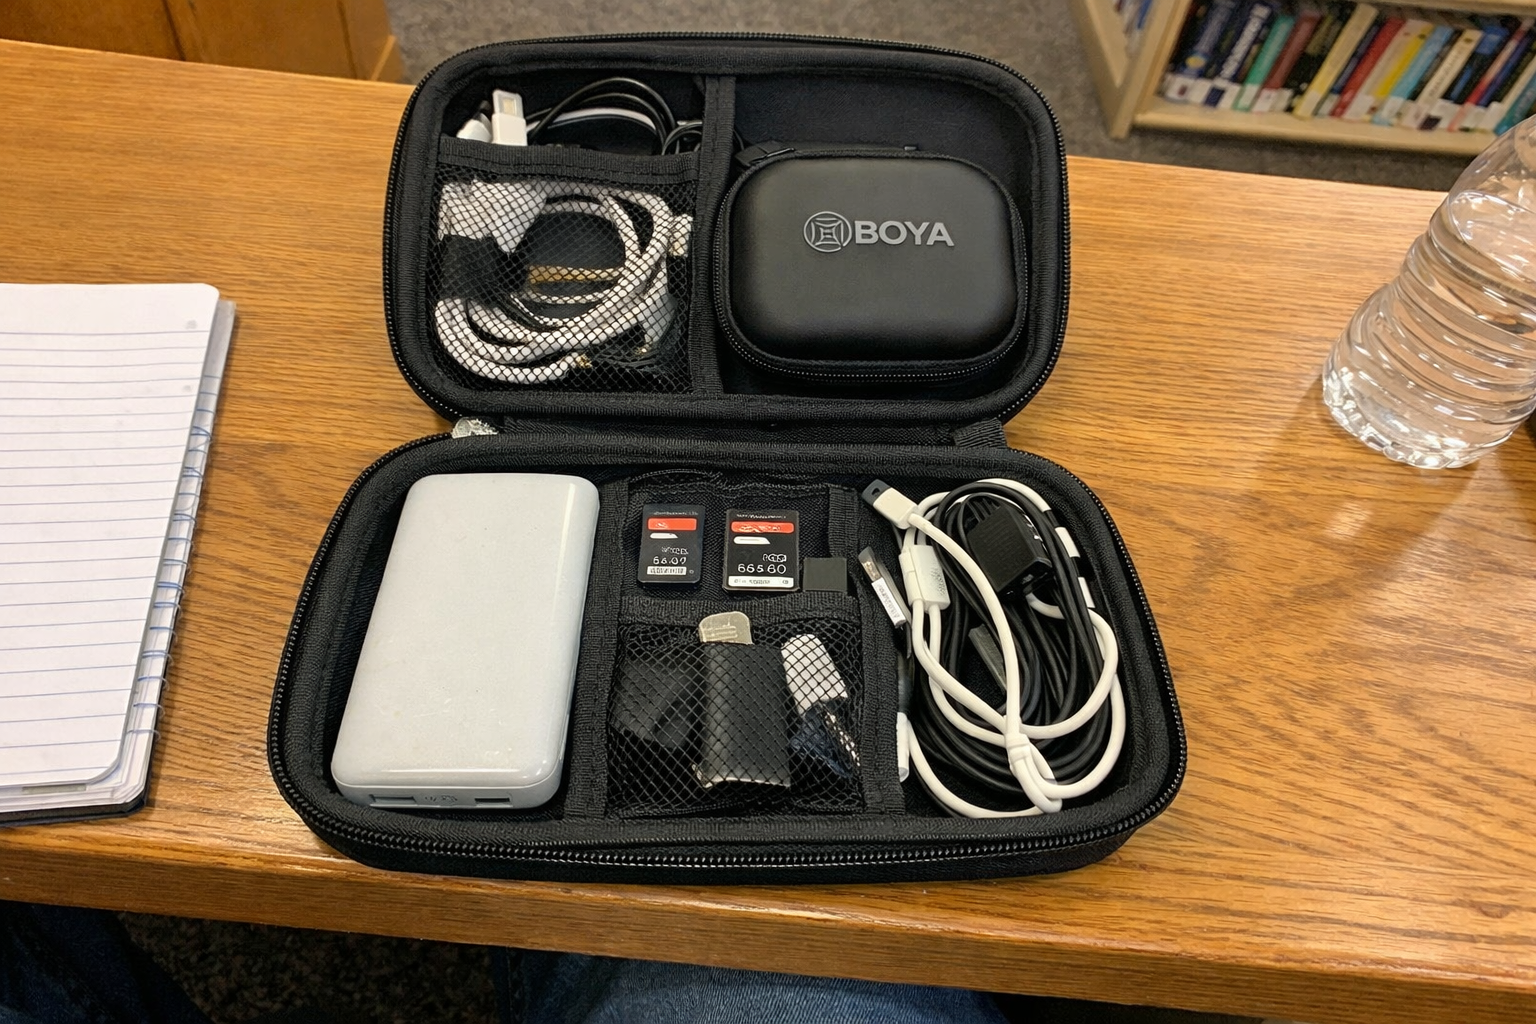
This is the least glamorous item here and maybe the one that saved me the most stress. I added the Luxtude Electronics Organizer Travel Case after one too many mornings digging through my backpack for a cable while everyone else was already seated. It keeps my chargers, mic, adapters, and small bits in one place, which sounds boring until you realise how much faster setup gets when your gear isn’t floating around loose. The hard shell also makes me less nervous about tossing my bag under a train seat or onto a lecture hall floor.
What I Appreciate
- ✅ Stops the “backpack cable soup” problem immediately
- ✅ Hard shell gives a bit more protection than soft pouches
- ✅ Divider layout makes it easy to customize for a small filming kit
What Frustrates Me
- ❌ Adds a bit of structure and bulk compared with just tossing things in a tote
- ❌ You still need discipline not to overpack it with random tech
Tisino Mini Wireless Lavalier Microphone
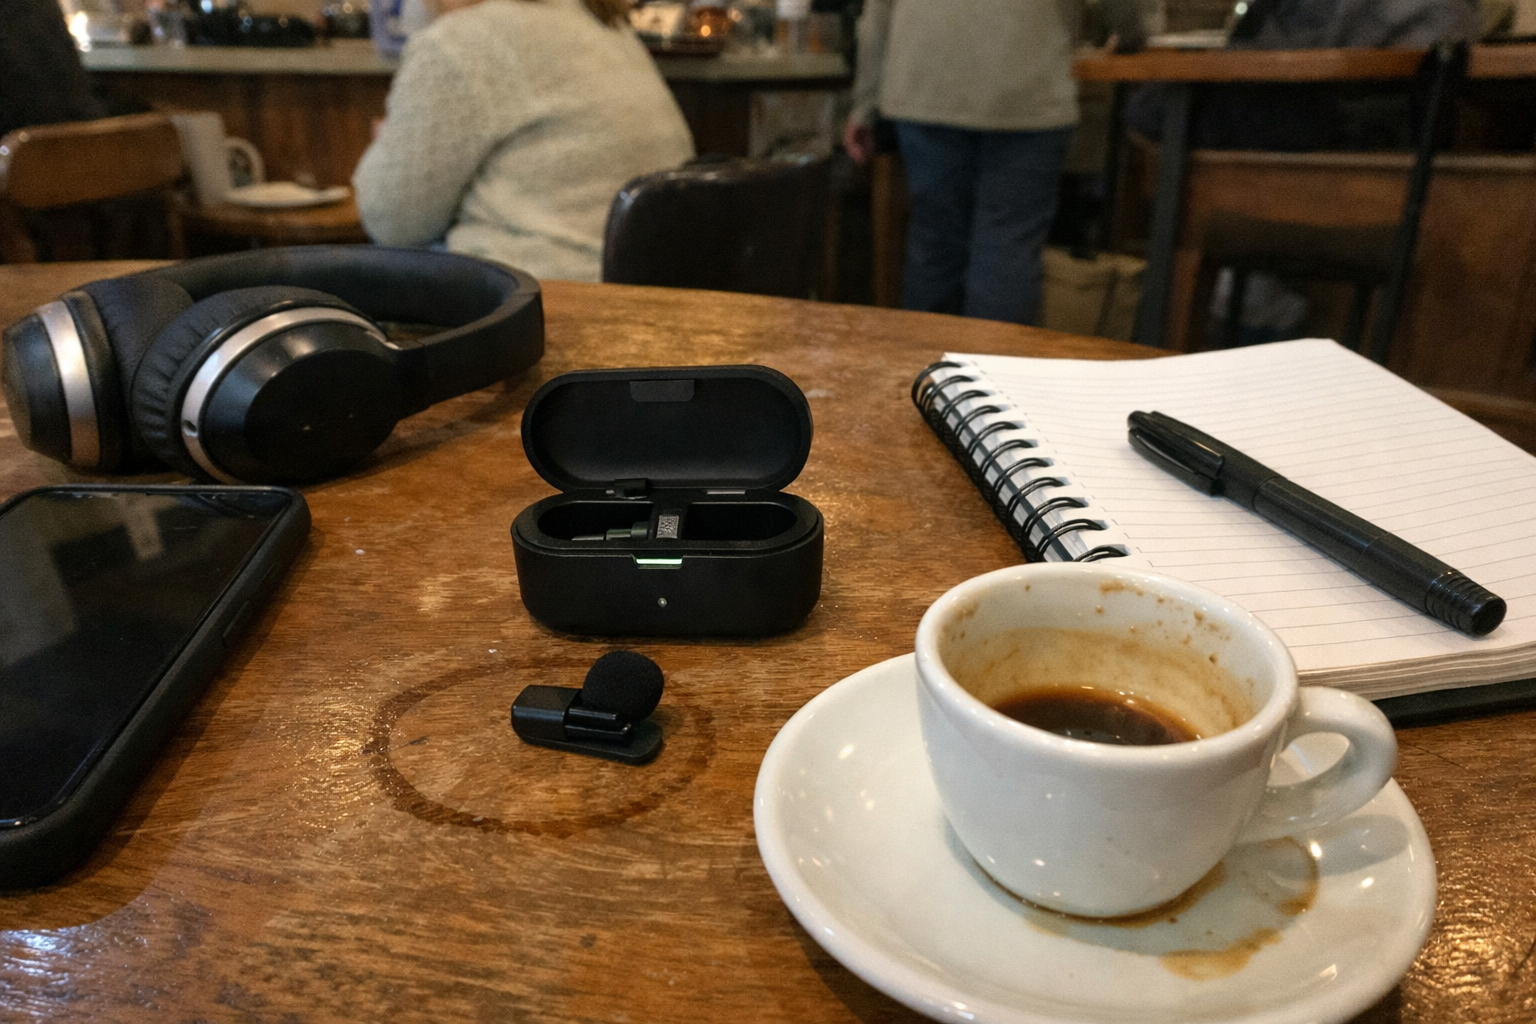
Audio is where cheap-looking content usually gives itself away, so I was very happy when the Tisino mini Wireless Lavalier Microphone turned out to be simple enough for my actual life. I didn’t want another gadget that needed ten setup steps or an app I’d forget to open. This one appealed to me because it’s plug-and-play and easy to clip on when I’m filming a talking segment before class or recording in a noisy café. It won’t magically erase London from the background, but it does help my voice come through much more clearly than raw phone audio.
What I Appreciate
- ✅ Big audio upgrade for such a small item
- ✅ Fast setup, which makes me more likely to actually use it
- ✅ Charging case is practical for long campus days
What Frustrates Me
- ❌ You still need to place it properly or your audio can sound off
- ❌ Another small thing to remember to charge before leaving home
| Item | What it solves for me | Best place I use it |
|---|---|---|
| Selfie light | Flat, bad indoor lighting | Lecture buildings, cafés, evening clips |
| Hand grip | Shaky handheld footage | Walking clips, quick outdoor filming |
| Mini tripod | Fast setup for stable shots | Café tables, library corners, desks |
| Tech organizer | Bag clutter and lost accessories | Everyday carry on campus and transit |
| Lavalier mic | Muddy phone audio | Talking videos, voice-led clips, interviews |
What I still want to improve
This setup works because it’s realistic, not because it’s perfect. I’m still figuring out how to make my backpack carry even smoother on long days when I’m also hauling a laptop, charger, notebook, and whatever snack I remembered to bring. The next thing I’m probably testing is a better way to pack all of this so I can grab filming gear without unpacking half my academic life onto a café table.
I’d also love to refine my outdoor workflow more, especially for windy London days and transit-heavy filming. Compact gear always involves trade-offs, but I’d rather have a kit I genuinely use three times a week than a “dream kit” that stays at home.
💡 The Final Verdict: worth it if you actually film on the move
If you’re a student, commuter, or casual content creator trying to build a budget campus filming kit, I genuinely think this kind of setup is worth the time and money. Not because every item is life-changing on its own, but because together they remove the little annoyances that stop you from filming consistently. If you mostly shoot at home, you probably don’t need all of this. But if your content happens between lectures, on trains, and in cafés, a compact backpack-friendly kit like this makes a huge difference.
Disclaimer: As an Amazon Associate, I earn from qualifying purchases.
Author
-

Hi, I’m Sophie — a Media Studies student, content creator, and full-time expert in making a busy student setup work on a budget.
I’m based in London, and this blog comes from everyday life: commuting across the city, working from campus and coffee shops, filming content on the go, and constantly trying to find gear that is affordable, reliable, and actually worth carrying around all day. As a student, I care a lot about value. I don’t want the cheapest option if it falls apart in two months, and I definitely don’t want to overpay just because something looks good online.
That’s what I focus on here.
I write about budget-friendly gear for students, commuters, and creators — things like durable backpacks with laptop sleeves, affordable laptops, portable SSDs, ergonomic accessories, and mobile content tools like tripods and ring lights. I’m especially interested in products that feel more expensive than they are and hold up well in real day-to-day use.
My reviews are practical and experience-based. A lot of them are built around how I actually use a product during a typical day: carrying it through campus, pulling it out in class, using it in cafés, packing it into a crowded commute, and seeing whether it still feels like a smart buy after a few weeks. If something is overpriced, badly designed, or only looks good in ads, I’ll say so. And if I find a budget product that genuinely performs well, that’s exactly the kind of thing I want to share.
If you’re looking for student-friendly gear that works hard without costing a fortune, this blog is for you.
Leave a Reply