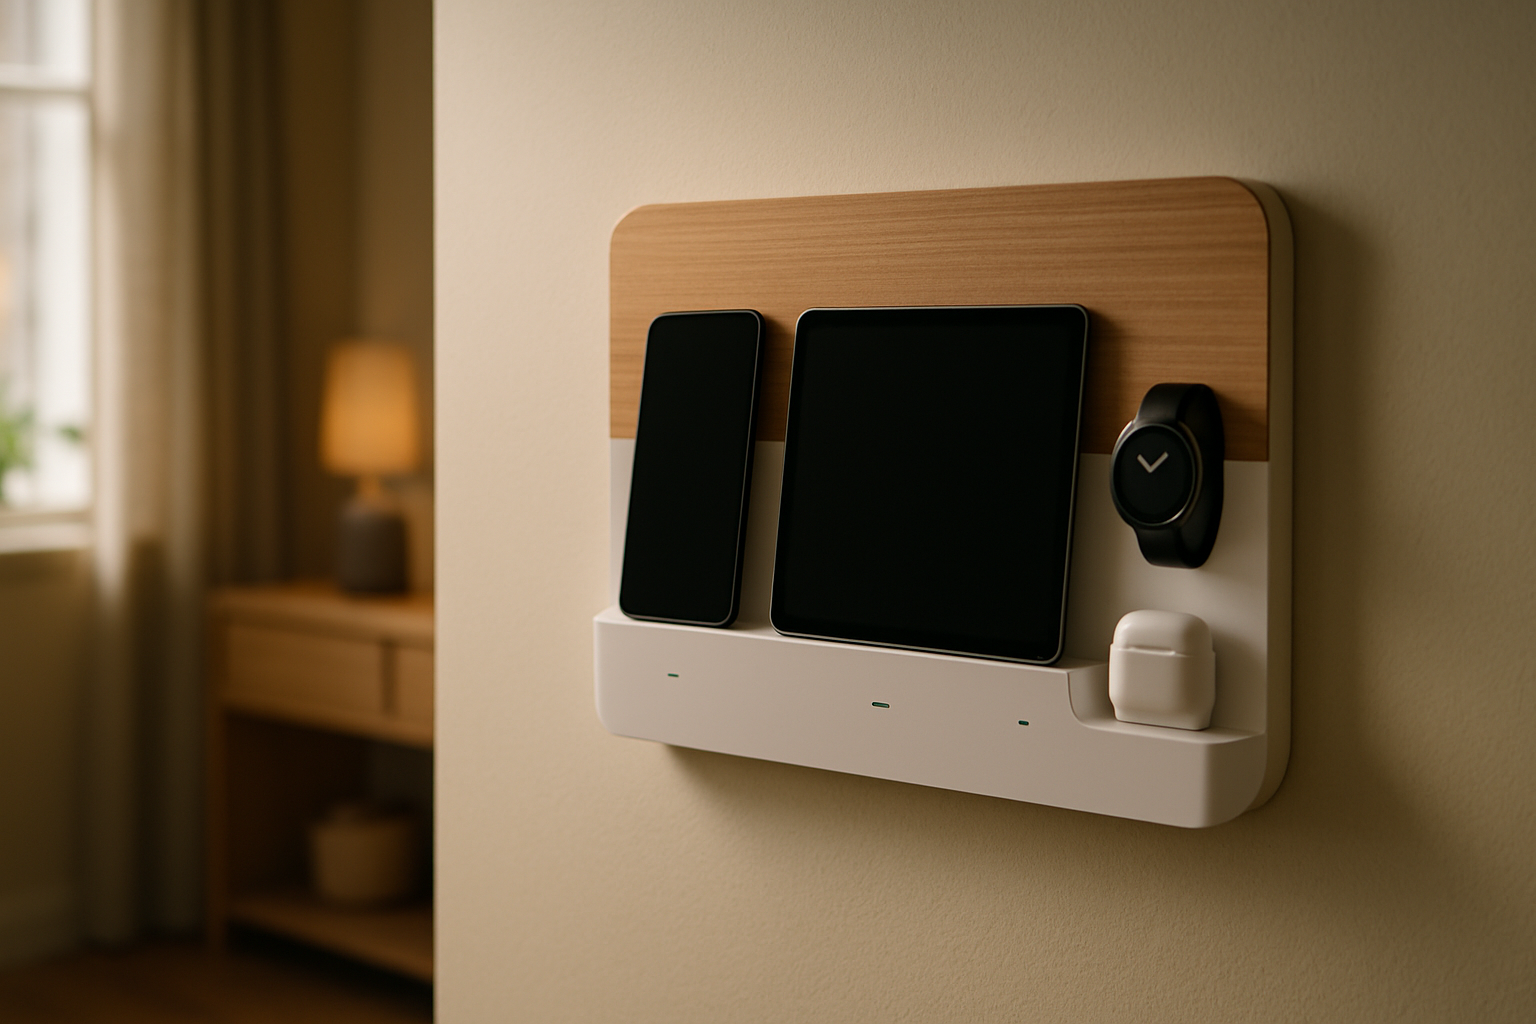
For a long time, my “charging area” was really just a pile of cords near the kitchen counter and whatever empty outlet happened to be available. Phones, tablets, battery packs, smart home remotes, my watch charger, even the handheld vacuum—everything was technically charging, but none of it felt organized. I finally got tired of hunting for cables every morning and decided to build a dedicated wall-mounted smart home charging station that my family could actually use without creating a fresh mess every day.
What Was Actually Broken in My Setup
Before pulling out my credit card, I had to figure out what the real problem was. It wasn’t just that I needed “more charging.” I already had plenty of chargers. What I was missing was a defined home for everyday devices and a cable layout that didn’t fight me.
In my house, the charging station needed to do four things well. First, it had to be mounted off the floor and off the counter so it wouldn’t turn into a junk magnet. Second, it needed enough output for real devices, not just a couple of slow USB ports. Third, it had to be easy for other people in the house to use without explaining which cable goes where. And fourth, it had to look clean enough that I wouldn’t rip it apart and redo it two weeks later.
I also learned pretty quickly that wall-mounted charging stations are really two separate projects: power delivery and cable discipline. Most people focus on the charger. In my experience, the charger matters, but cable routing is what decides whether the setup still looks good a month later.
The Gear I Actually Used
I built this around a hallway utility wall near our main living area, not in an office. That meant I cared less about making it pretty for Instagram and more about making it durable and easy to reach during the normal chaos of the day. Here’s what ended up earning a permanent spot.
Anker Prime 200W 6-Port GaN Charging Station
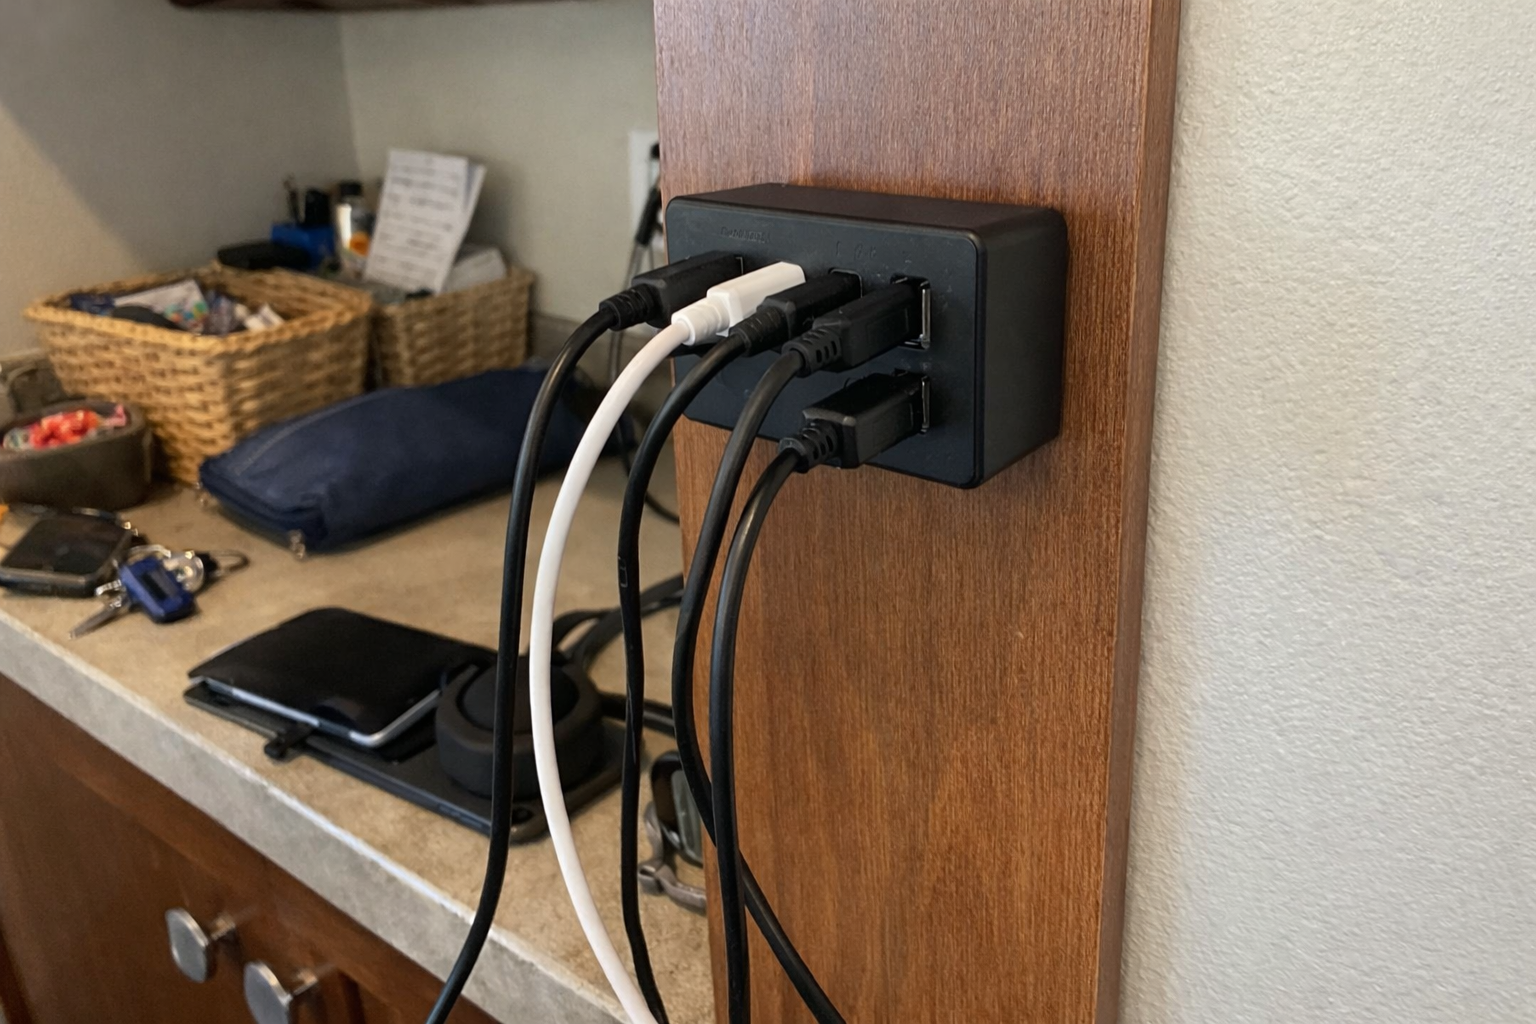
This is the piece that made the whole setup viable. I went with the Anker Prime 200W charging station because I needed one charger that could handle multiple real devices at once instead of a bunch of weak little wall bricks. In my house that means phones, tablets, a battery bank, and sometimes even a laptop getting topped off at the same time. It’s not a travel charger, and it’s heavier than the average charger, but for a dedicated wall-mounted charging station that’s actually a plus. Once I gave it a proper home, it felt solid and dependable.
What I Appreciate
- ✅ Enough power for multiple devices without playing outlet Tetris
- ✅ USB-C output is strong enough for laptops and tablets, not just phones
- ✅ Replaces a whole cluster of random charging bricks
What Frustrates Me
- ❌ Heavy enough that you need to think through how you’re mounting and supporting it
- ❌ Definitely more of a permanent station than something you casually move around
FLYLEAD Magnetic Cable Clips
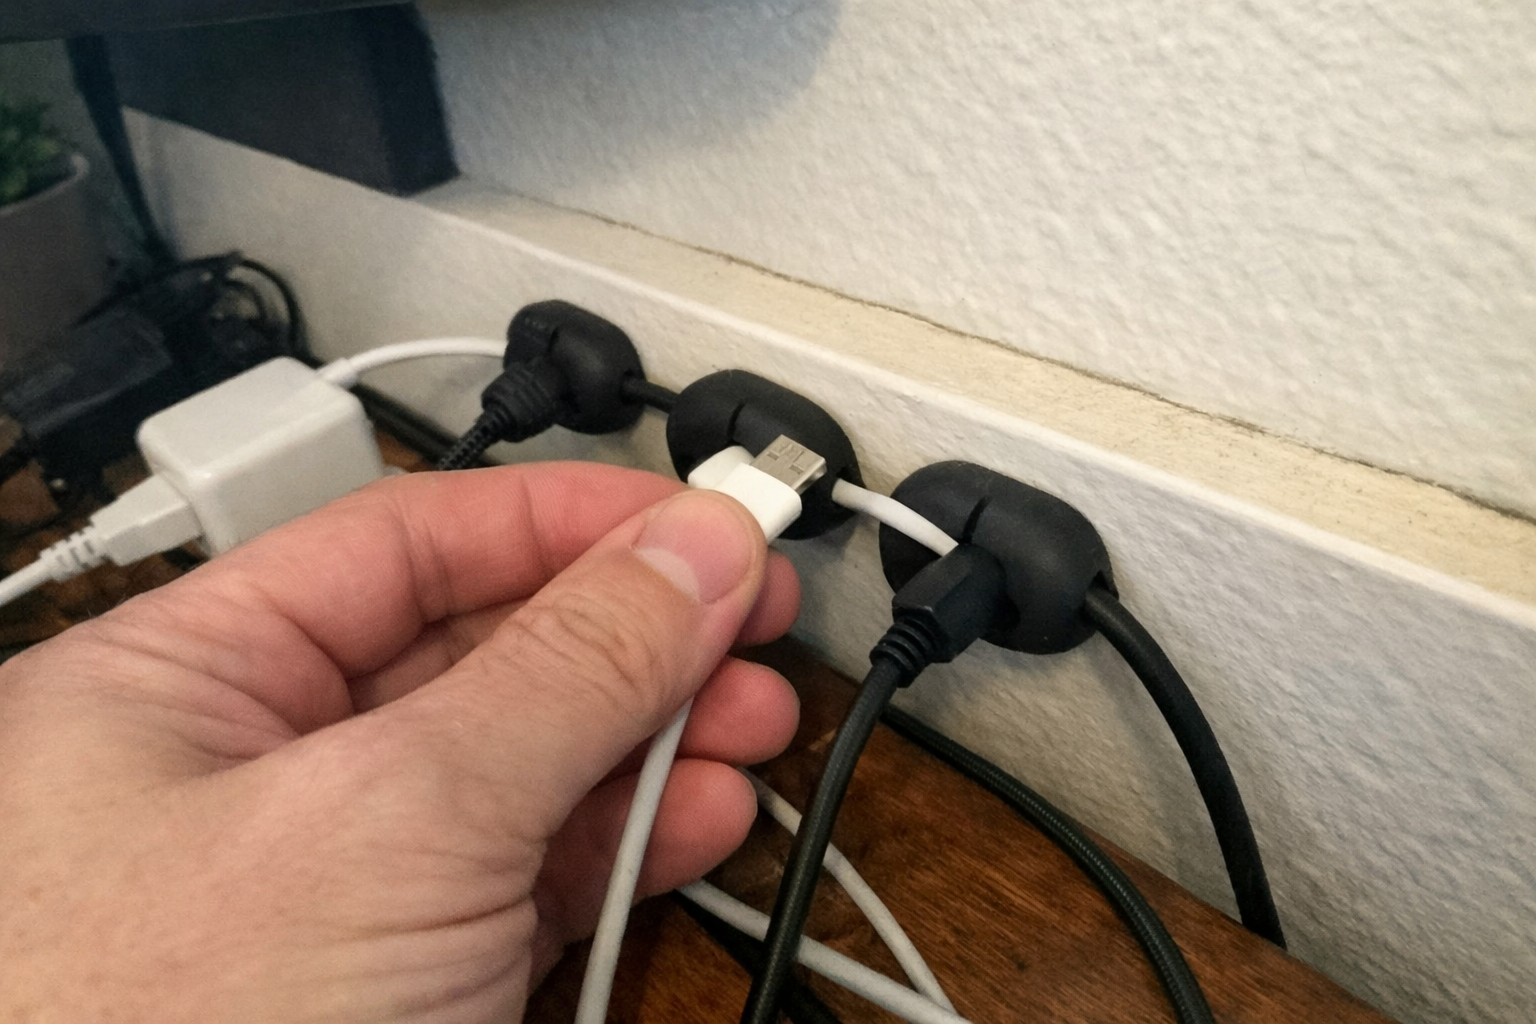
If the charger is the engine, these little FLYLEAD magnetic cable clips are what kept the setup from turning back into a spaghetti pile. I used them to hold the charging ends in predictable spots so cables don’t slide down behind the bench or hang all over the wall. I like that they’re silicone instead of hard brittle plastic. That sounds minor, but cheap plastic cable clips are exactly the kind of thing that crack or pinch a cable jacket after a while. My one big note: clean the mounting surface properly and give the adhesive time to set. If you rush that part, you’re just creating extra work for yourself later.
What I Appreciate
- ✅ Keeps cable ends easy to grab instead of dropping behind furniture
- ✅ Soft material is kinder to thicker charging cables
- ✅ Magnetic closure makes quick changes easy
What Frustrates Me
- ❌ Adhesive prep matters more than people think
- ❌ Tiny parts mean placement takes some trial and error if you’re picky like me
Anker Power Strip with Surge Protector
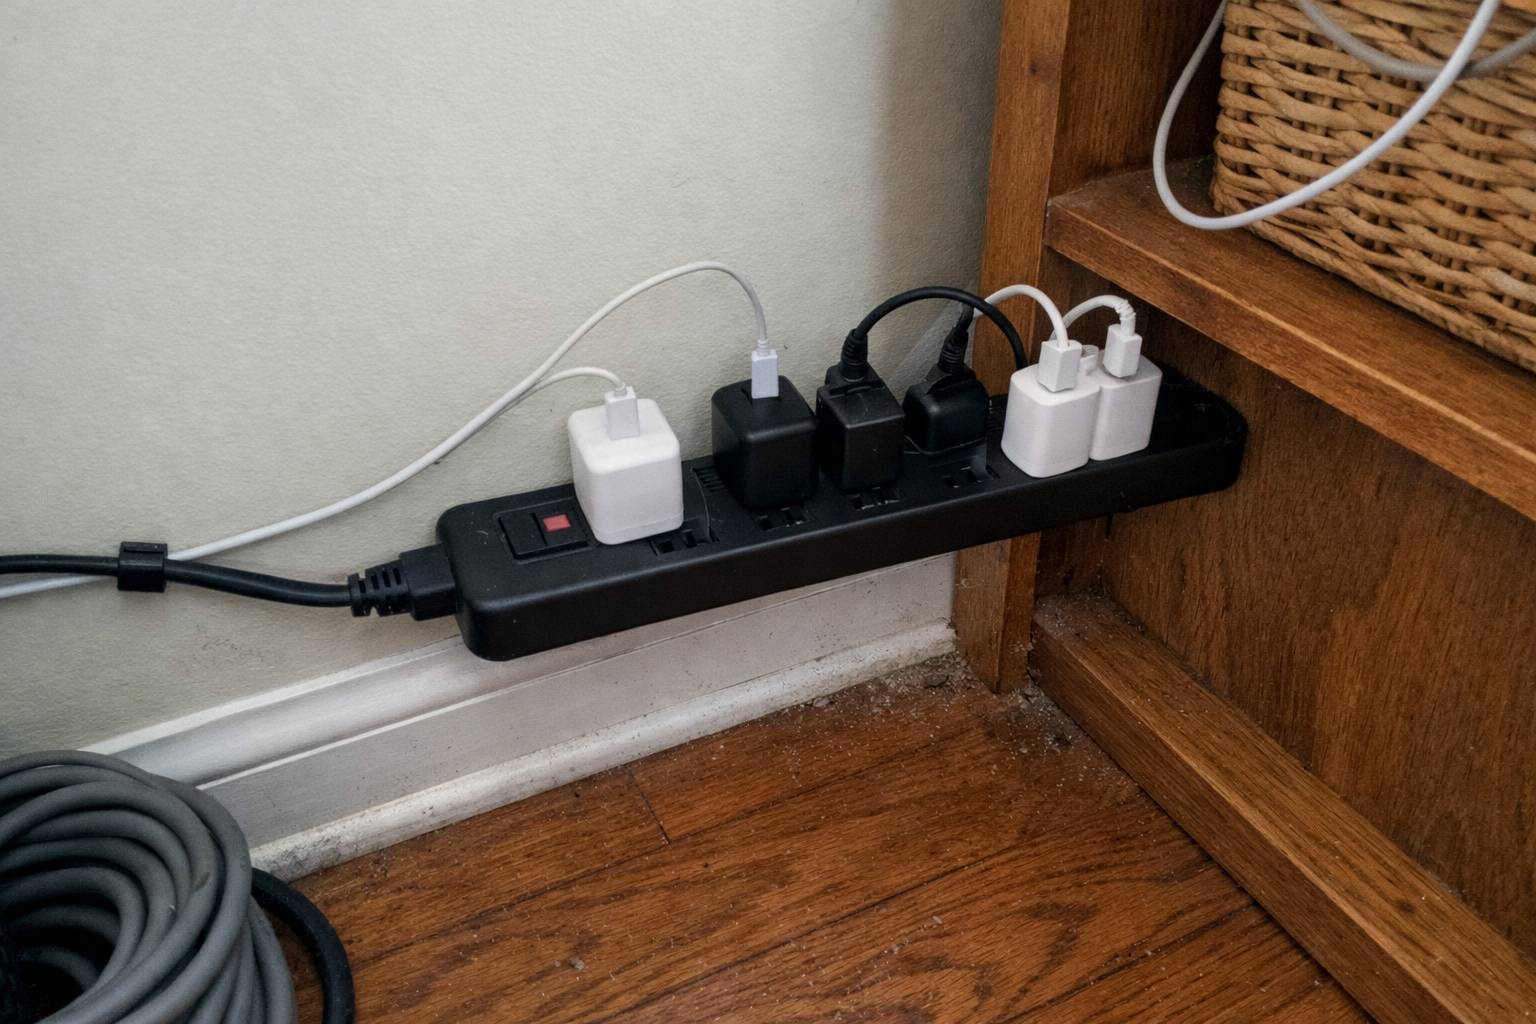
I used the Anker power strip with surge protection as the backbone behind the station. Even though the main daily charging goes through the GaN charger, I still needed reliable AC power for a few odds and ends and wanted surge protection built into the system. This also gave me room to expand later without opening up the wall or redesigning everything. The spacing between outlets is better than average, which matters when you have bulkier plugs and adapters that never seem to play nice together.
What I Appreciate
- ✅ Good outlet count for a growing smart home setup
- ✅ Surge protection adds a little peace of mind
- ✅ Better spacing than a lot of crowded power strips
What Frustrates Me
- ❌ Bigger than a minimalist setup really needs
- ❌ The onboard USB ports are handy, but I still preferred the dedicated GaN charger for most daily use
Wall Mounted Charging Dock for Dyson V7 and V8
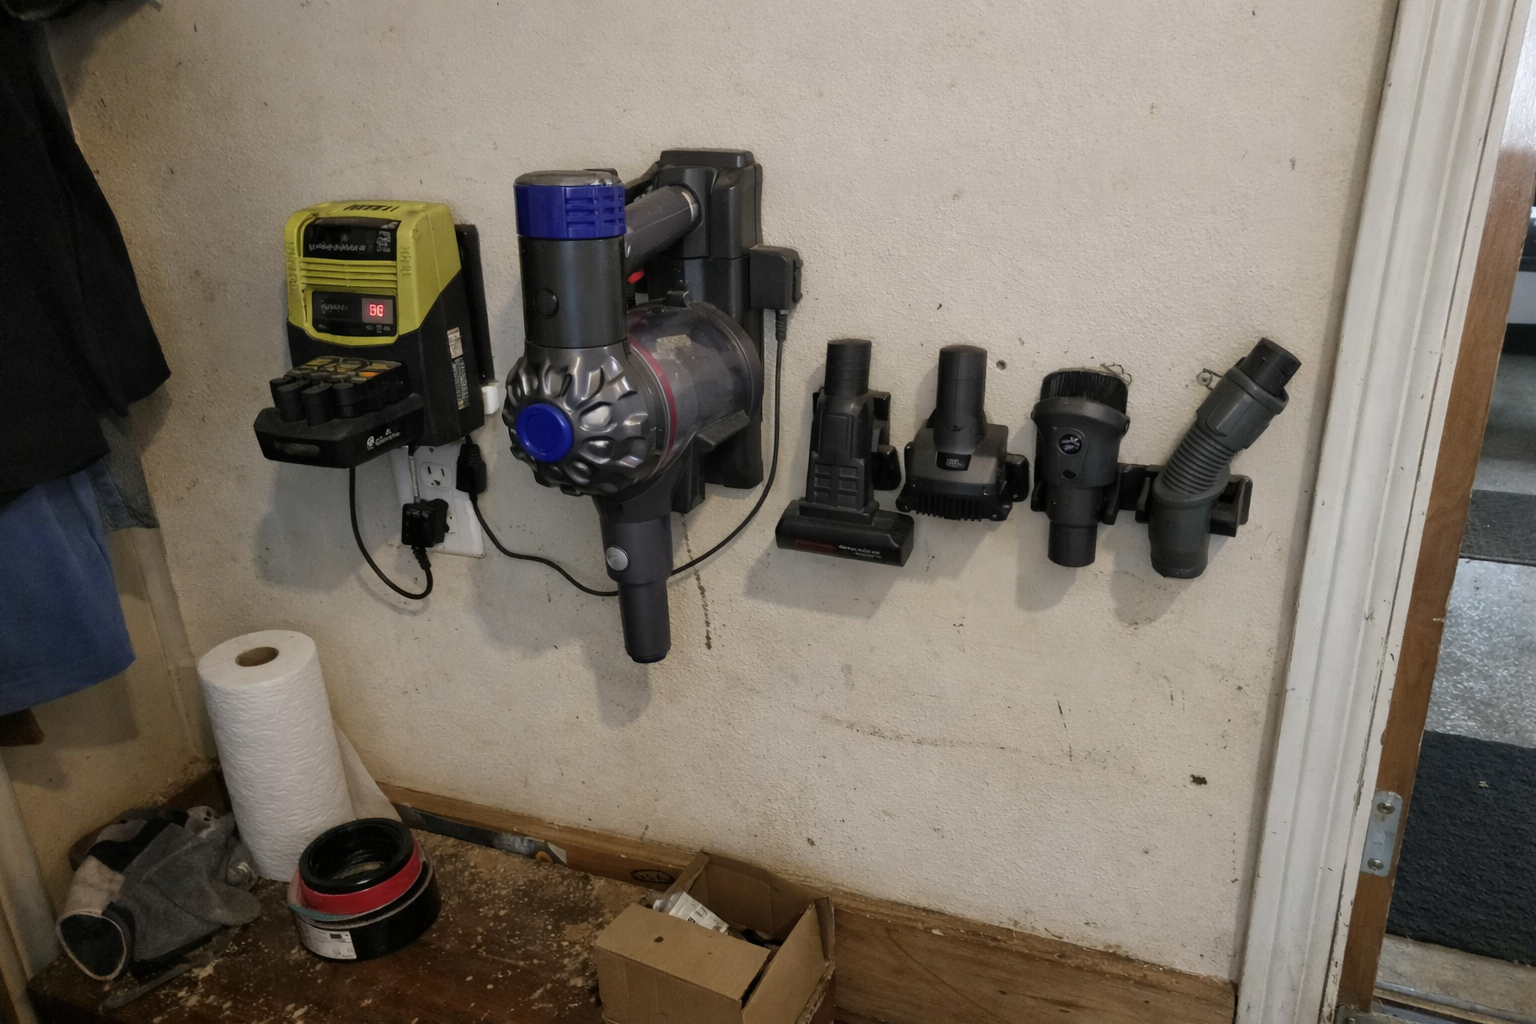
This one is a little more specific, but it solved a real annoyance in my house. I added the wall-mounted charging dock for Dyson V7/V8 next to the main station so the vacuum had a proper home too. That might sound separate from a smart home charging station, but honestly it fits the same idea: everyday rechargeable gear should live in one predictable zone. This bracket is straightforward. You screw it in, route the charger, and stop leaning the vacuum in random corners. It’s not fancy, but it does the job.
What I Appreciate
- ✅ Gives the vacuum a permanent charging location
- ✅ Keeps attachments from wandering around the house
- ✅ Simple install if you’re comfortable with basic wall mounting
What Frustrates Me
- ❌ Only useful if you already have a compatible Dyson model
- ❌ It’s a functional plastic bracket, not some premium-looking piece of hardware
Xpatee Under Desk Cable Management Tray
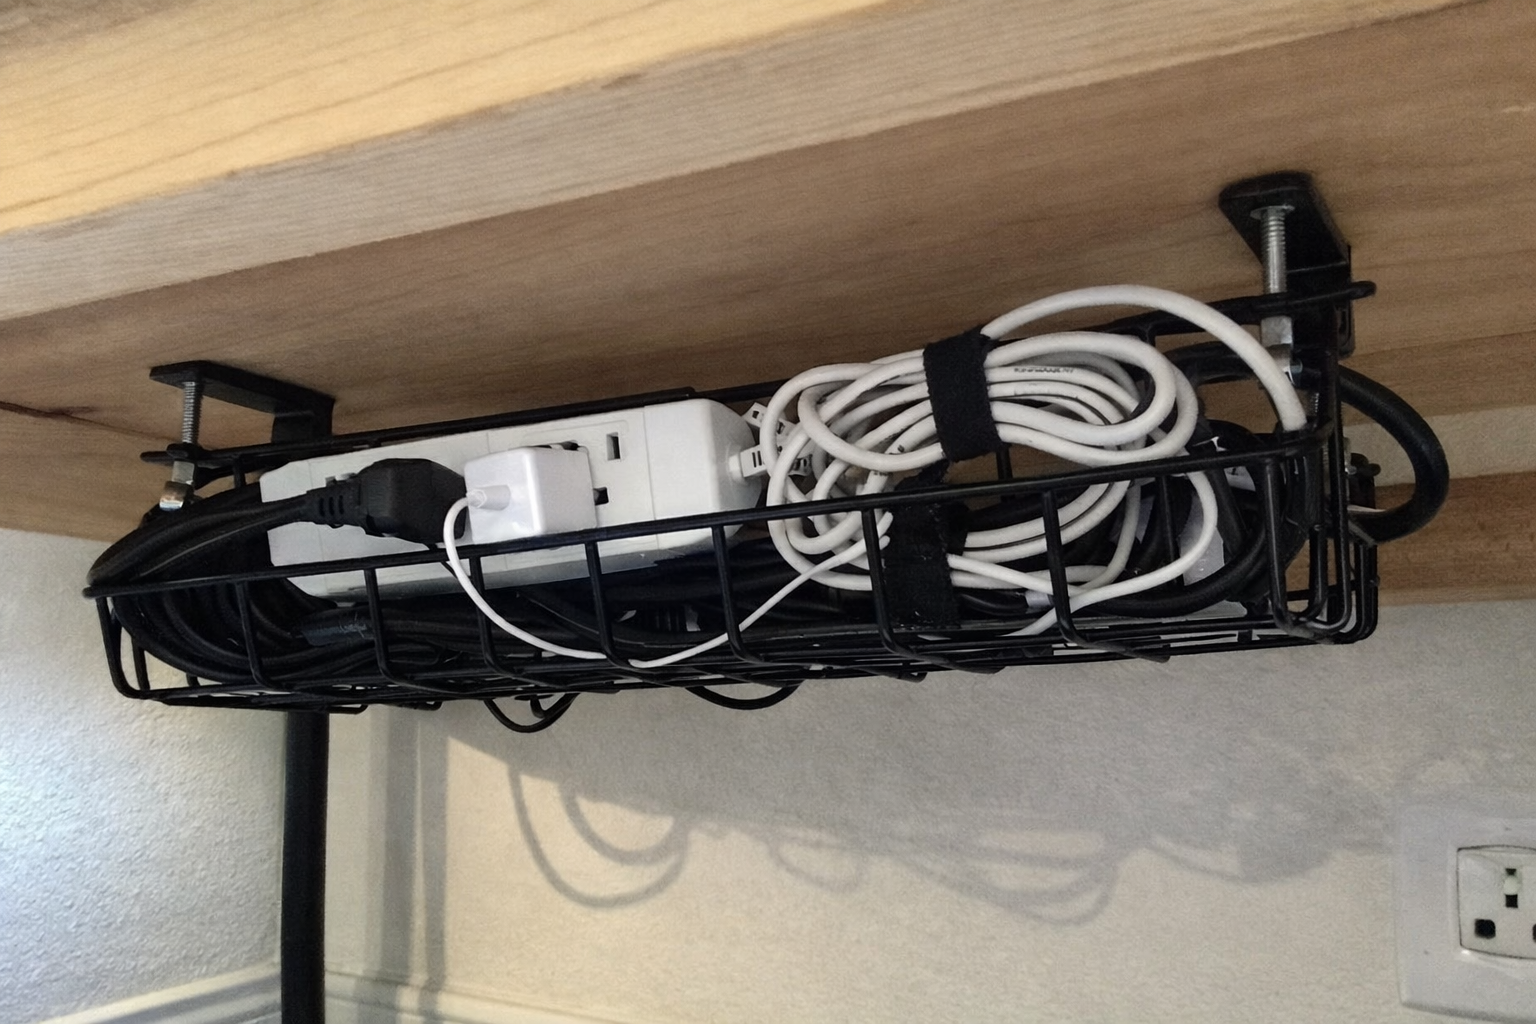
This wasn’t technically designed for a wall, but the Xpatee cable management tray helped me prototype and organize the lower part of the station where I needed to hide extra cord slack and adapters. In a bench, shelf, or side-panel charging station build, a tray like this is great for getting the ugly stuff out of sight without permanently drilling into furniture. The open design also makes it easier to change things later. As somebody who is always tweaking cable layouts, that matters a lot more to me than a perfectly sealed box.
What I Appreciate
- ✅ Great for hiding power bricks and extra cable length
- ✅ No-drill clamp design is renter-friendlier than permanent hardware
- ✅ Easy to revisit when you inevitably change something later
What Frustrates Me
- ❌ Makes the most sense when attached to furniture, shelving, or a bench structure rather than directly to drywall
- ❌ Still requires some patience if you want the cables inside it to look truly clean
What Each Piece Actually Does in the Station
| Item | Main Job in My Setup | Best For | My Honest Note |
|---|---|---|---|
| Anker Prime 200W Charger | High-output USB charging hub | Phones, tablets, battery packs, laptops | This is the heart of the station |
| FLYLEAD Cable Clips | Keeps cable ends where they belong | Daily grab-and-go charging spots | Small upgrade, big quality-of-life improvement |
| Anker Surge Protector | Power distribution and surge protection | Expanding the station safely | Not glamorous, but important |
| Dyson Wall Dock | Dedicated charging home for vacuum | Rechargeable cleaning gear | Worth it if your vacuum usually floats around the house |
| Xpatee Cable Tray | Hides excess cords and adapters | Bench, shelf, or furniture-mounted installs | Useful support piece, especially for cleaner routing |
What I’d Still Improve Next
The station works, but I’m not pretending it’s the final form. My next step is labeling a couple of cable ends and adding one magnetic charging spot for smaller smart home devices that get rotated in and out, like remotes and rechargeable flashlights. I’m also considering a shallow wall shelf above the station so tablets and battery packs have a proper resting place while charging instead of sitting on the nearest flat surface.
The other thing I’d improve is making the system a little more kid- and guest-proof. When a charging station is really successful, everybody uses it. That’s great, but it also means people plug things in fast and rarely put cables back exactly where you want them. So the next version of this setup will be less about adding more power and more about making the cable layout even harder to mess up.
💡 The Final Verdict: Worth It If You’re Tired of Chasing Cables
If your everyday devices are constantly migrating from counter to counter and you’re sick of outlet clutter, building a dedicated wall-mounted smart home charging station is absolutely worth the effort. The big win isn’t just faster charging. It’s reducing friction in the house. You always know where the cables are, where the vacuum lives, and where to drop a device at the end of the day. I think this setup makes the most sense for busy households, smart home tinkerers, and anybody who wants their gear ready without turning a kitchen counter into a charging landfill.
Disclaimer: As an Amazon Associate, I earn from qualifying purchases.
Author
-

Hi, I’m Andrew — an IT support specialist, smart home consultant, and someone who has spent more time than I’d probably admit fixing, upgrading, and reorganizing tech around the house.
I’m based in Seattle, and this blog grew out of years of hands-on trial and error with smart home gear, home lab setups, repair tools, and all the little accessories that make a system easier to live with. I’ve always liked understanding how things work, taking them apart when necessary, and finding better ways to set them up the second time around.
Here, I write about smart home products, DIY tech tools, server rack accessories, cable management solutions, and display gear for collectibles. Most of what I cover is practical, everyday equipment — the kind of stuff that sounds simple until you actually have to install it, troubleshoot it, or live with it for a few months.
My approach is straightforward and honest. I like step-by-step setup, real-world testing, and explaining what a product is actually like to use, not just what the box promises. That includes calling out flimsy materials, bad instructions, confusing installation, or design choices that make no sense once you start working with the product. If something is well made and easy to use, I’ll say that too.
A lot of my reviews come from real projects at home — building out servers, improving smart home automation, cleaning up cable messes, repairing devices, and figuring out better ways to store and display the things I care about.
If you like practical gear, clear explanations, and honest feedback from someone who actually installs the stuff himself, you’ll probably feel at home here.


Leave a Reply