For way too long, my garage setup for smart home installs was basically a rolling pile of half-used cable ties, driver bits, extension cords, dead batteries, and mystery USB cables I swore I might need someday. Every time I had to mount a smart thermostat, swap a doorbell transformer, or troubleshoot a zigbee hub, I was wasting ten minutes just finding the right tool or charging cable. That gets old fast, especially when you’re in the middle of a real repair and not in the mood to dig through three bins and a drawer full of junk.
So I finally stopped pretending I just needed to “clean up a little” and built a proper garage wall-mount charging and tool storage zone. Nothing fancy, nothing Pinterest-perfect. Just a practical setup that lets me grab a drill, charge a device, find the right cable, and put everything back without making a bigger mess. If you do smart home installations, DIY tech repair, or any kind of garage workshop organization, this kind of wall setup makes a bigger difference than most people think.
What Was Actually Broken in My Garage Workflow
Before I bought anything, I had to be honest about the real problem. It wasn’t just clutter. The problem was friction.
I had tools in one spot, charging bricks in another, bulk supplies on a shelf that was too deep, and extension cords draped wherever they happened to land. That meant every little garage task had extra steps. If I needed to charge a flashlight, I had to clear bench space first. If I needed a precision screwdriver, I’d find three Phillips drivers before the one I actually wanted. And if I was installing smart home gear on a Saturday, I’d come back into the garage with a handful of small parts and nowhere obvious to put them.
Once I looked at it that way, the criteria got simpler. I needed:
- Vertical storage for the tools I use constantly
- A dedicated charging area that doesn’t take over the workbench
- Visible cable organization, so I’m not opening random boxes
- One heavy-duty shelving unit for bulk stuff and overflow
- Better power access without cords snaking across the floor
That was the whole plan. Not “ultimate garage makeover.” Just less wasted motion. If you’re setting up a garage wall storage system for DIY repairs, that’s where I’d start.
The Setup I’m Using Now
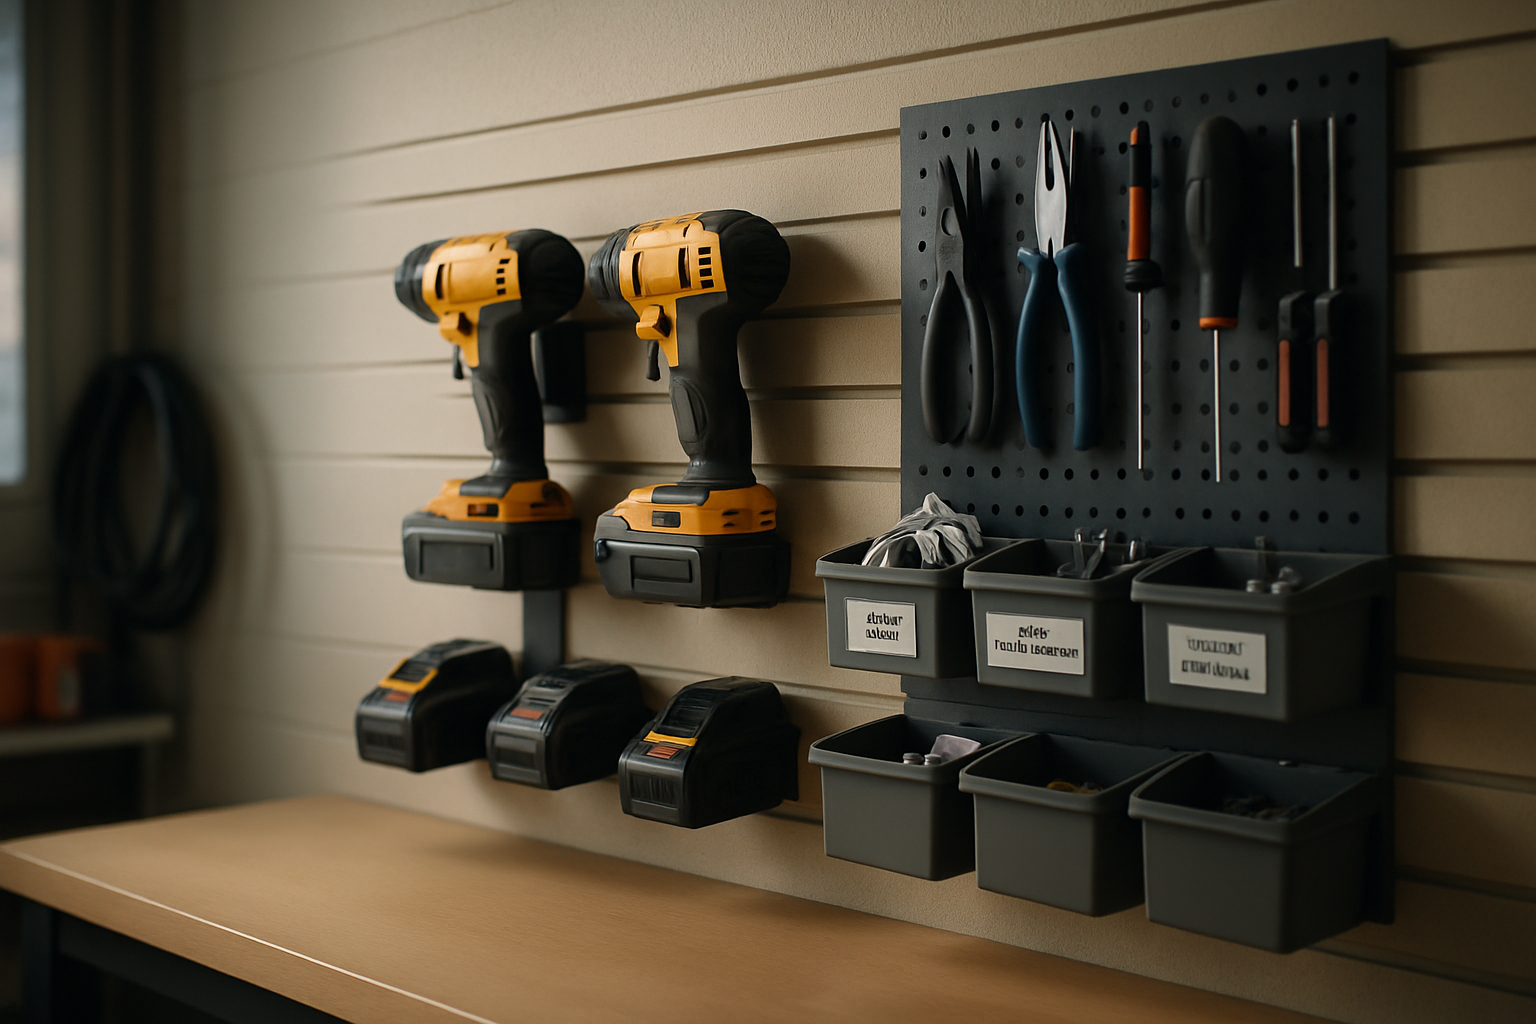
Wall Organizer Peg Board
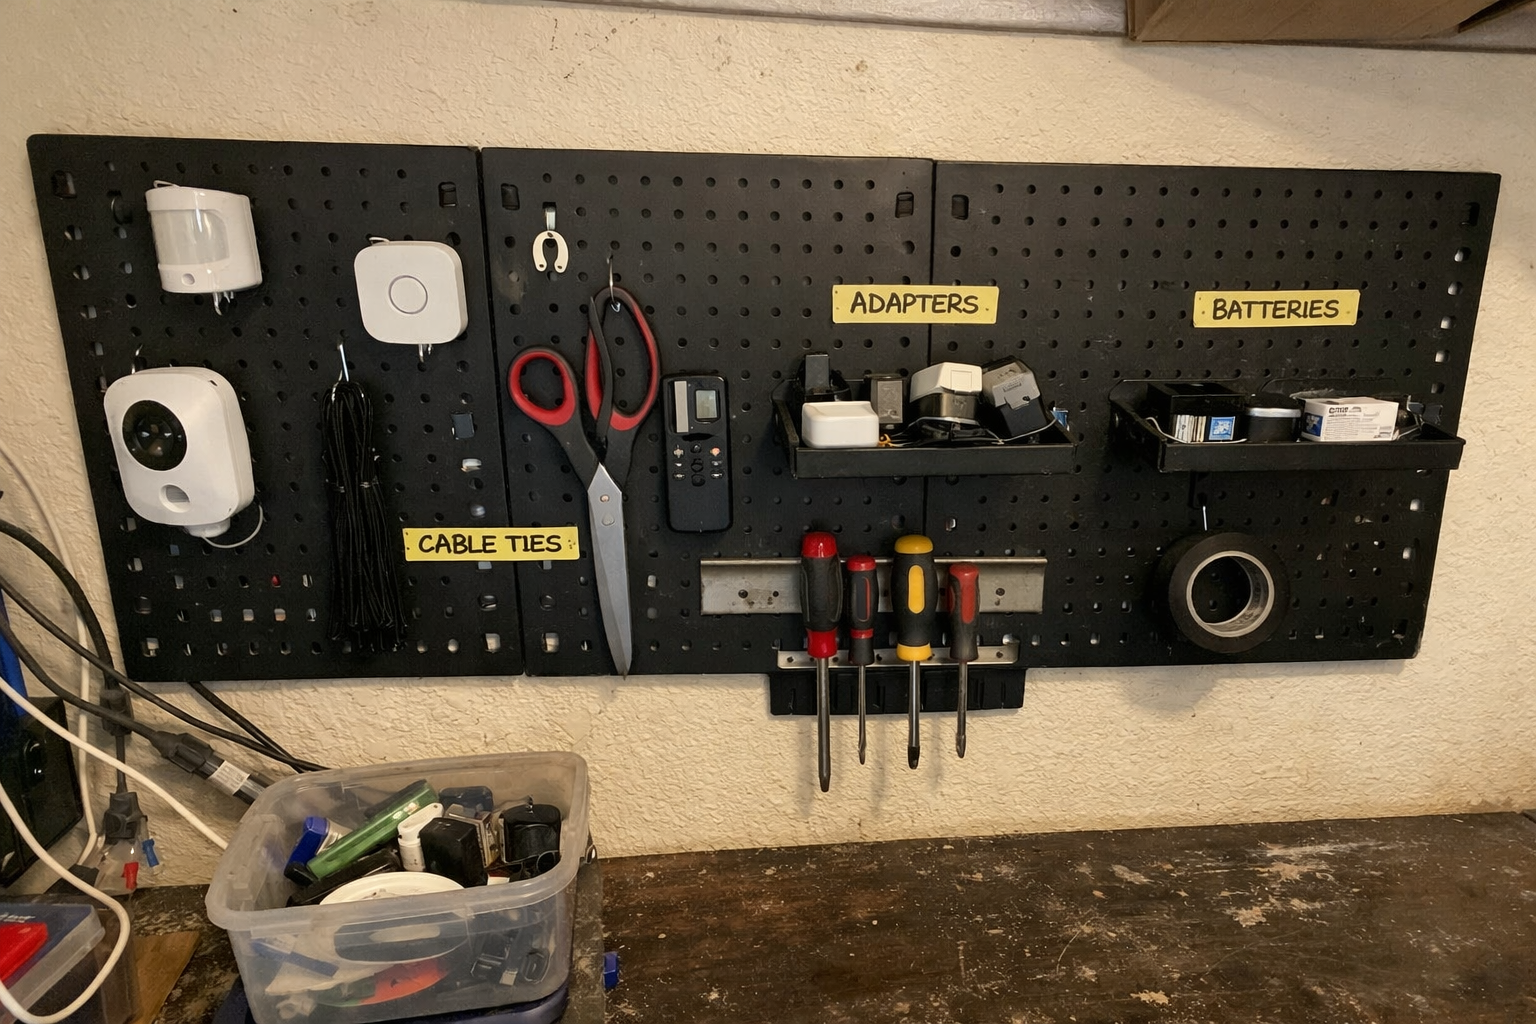
I used the Wall Organizer Peg Board as the lightweight command center for the stuff I reach for all the time: flush cutters, a voltage tester, small pliers, labeling supplies, cable clips, and a couple of charging accessories. I would not treat this like industrial garage storage, because it’s a plastic pegboard system, but for lighter smart home install gear it works fine. I went with nails instead of trying to get cute with adhesive mounting, because garage walls are not the place where I trust “maybe sticky enough.”
What I Appreciate
- ✅ Good for lightweight tools and small install parts
- ✅ Easy to rearrange when your workflow changes
- ✅ Helps keep the bench surface clear
What Frustrates Me
- ❌ Not something I’d use for heavy hand tools or power tools
- ❌ Plastic feel is decent, but not premium
- ❌ Included layout options are a little limited if you like custom spacing
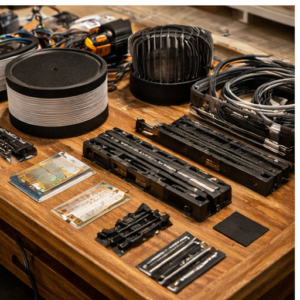
Cable Organizer Storage Boxes
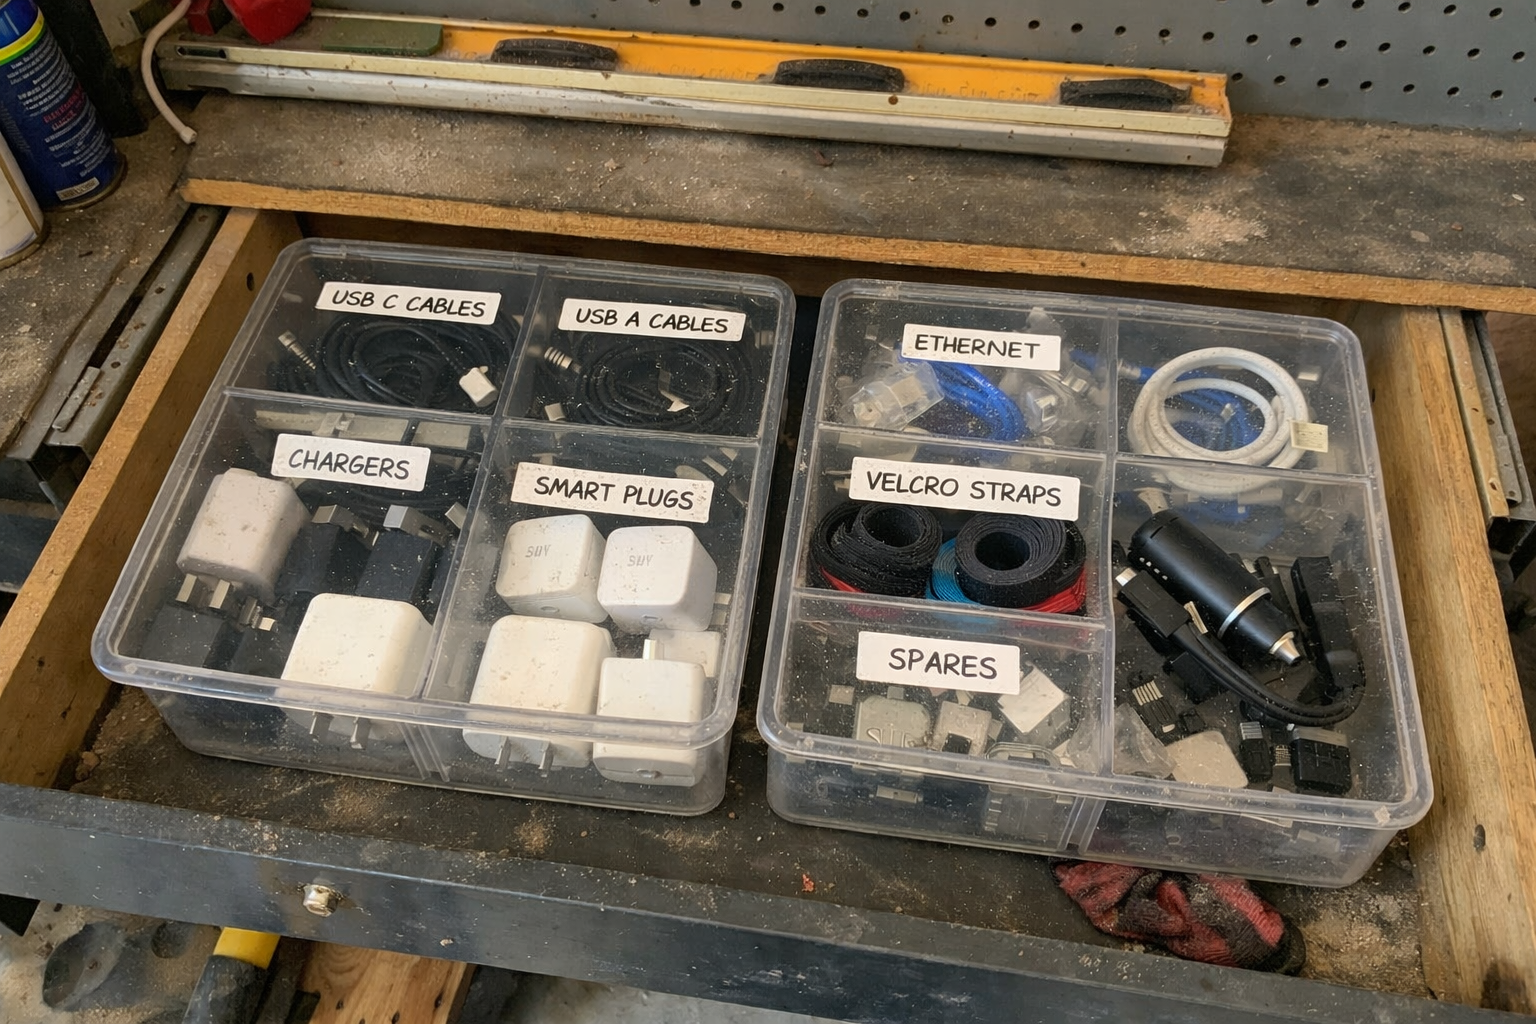
The least glamorous part of this whole setup is probably the most useful. I added the Cable Organizer Storage Boxes for all the little cords and adapters that used to migrate across my garage like wildlife. Because they’re clear, I can actually see what’s inside without opening every container. I used one for charging gear and one for data cables and oddball adapters. The removable dividers helped more than I expected, especially for separating USB-C, micro-USB, short extension leads, and those tiny power supplies that come with hubs and controllers.
What I Appreciate
- ✅ Clear lids make it easy to spot the right cable fast
- ✅ Dividers are useful for organizing small accessories
- ✅ Stack neatly on a shelf without wasting space
What Frustrates Me
- ❌ Best for small to medium cords, not thick bulky extension cables
- ❌ You still need to label or sort thoughtfully or it becomes a junk box
Magnetic Tool Holder Strip Set
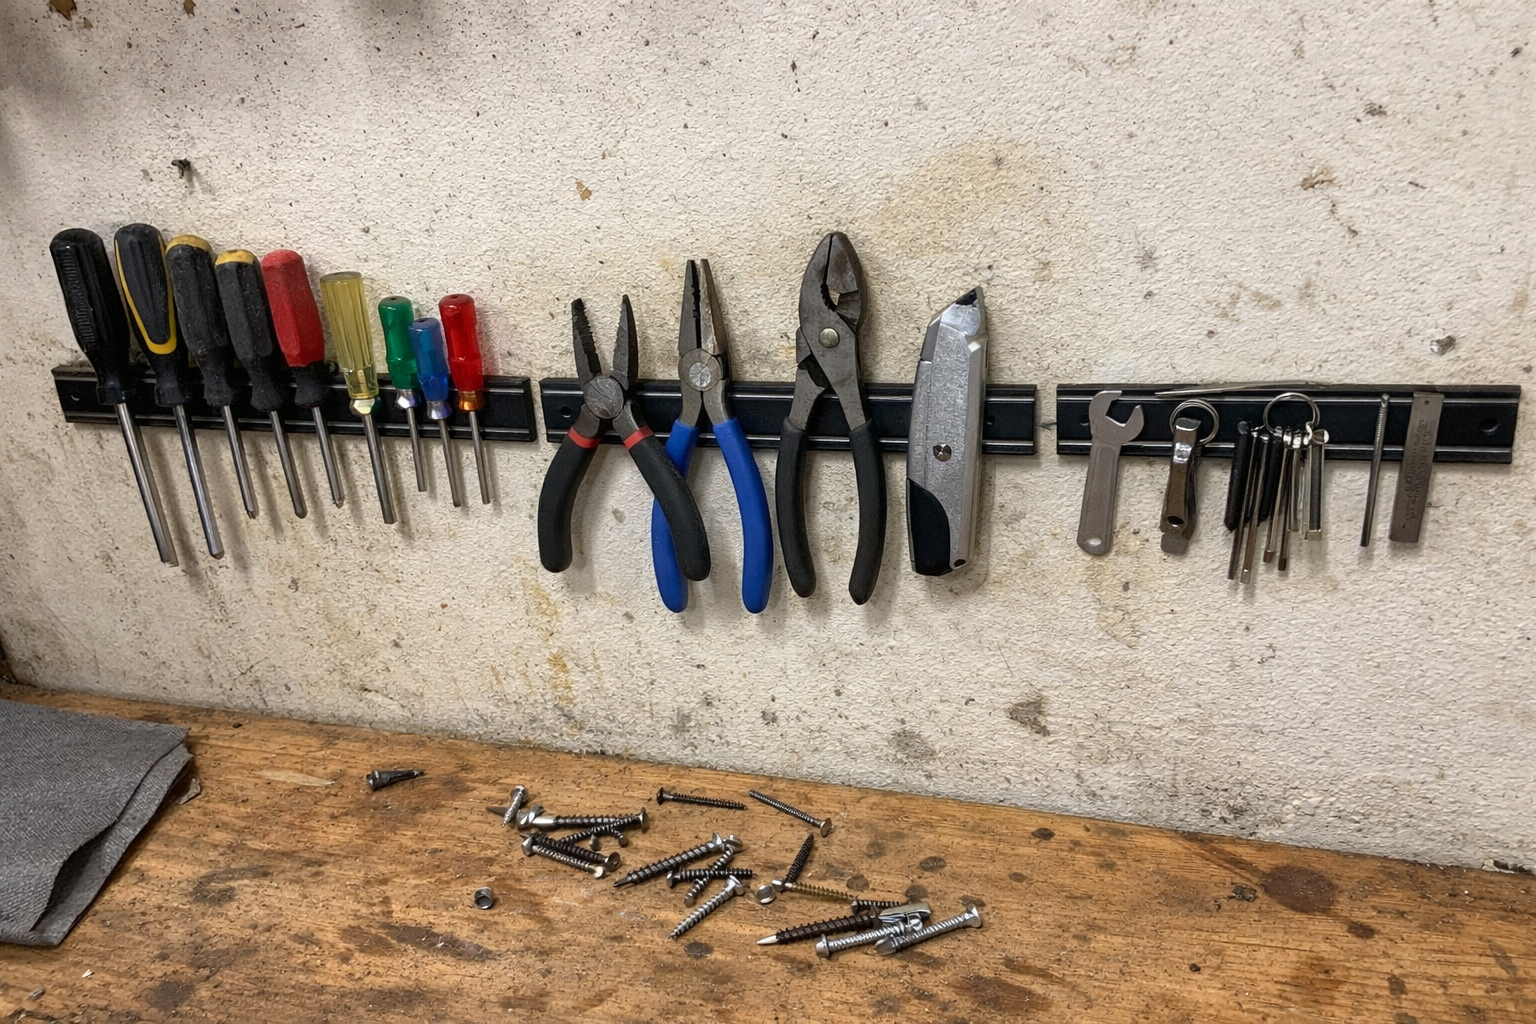
This was one of the best additions. I mounted the Magnetic Tool Holder Strip Set next to the pegboard for the metal tools I grab constantly. Screwdrivers, stubby drivers, needle-nose pliers, wire strippers, and my favorite small adjustable wrench all live there now. If you do DIY repairs or smart home installation work, magnetic strips make a lot of sense because you can see everything instantly. No drawer digging, no pulling out a pouch, no losing track of the one bit driver you actually like.
What I Appreciate
- ✅ Fastest way I’ve found to access hand tools
- ✅ Strong hold for common metal tools
- ✅ Makes it obvious when something hasn’t been put back
What Frustrates Me
- ❌ Not useful for non-magnetic tools or plastic-handled accessories with little metal exposure
- ❌ You need to mount them carefully or the spacing gets awkward
DEWENWILS Retractable Cord Reel
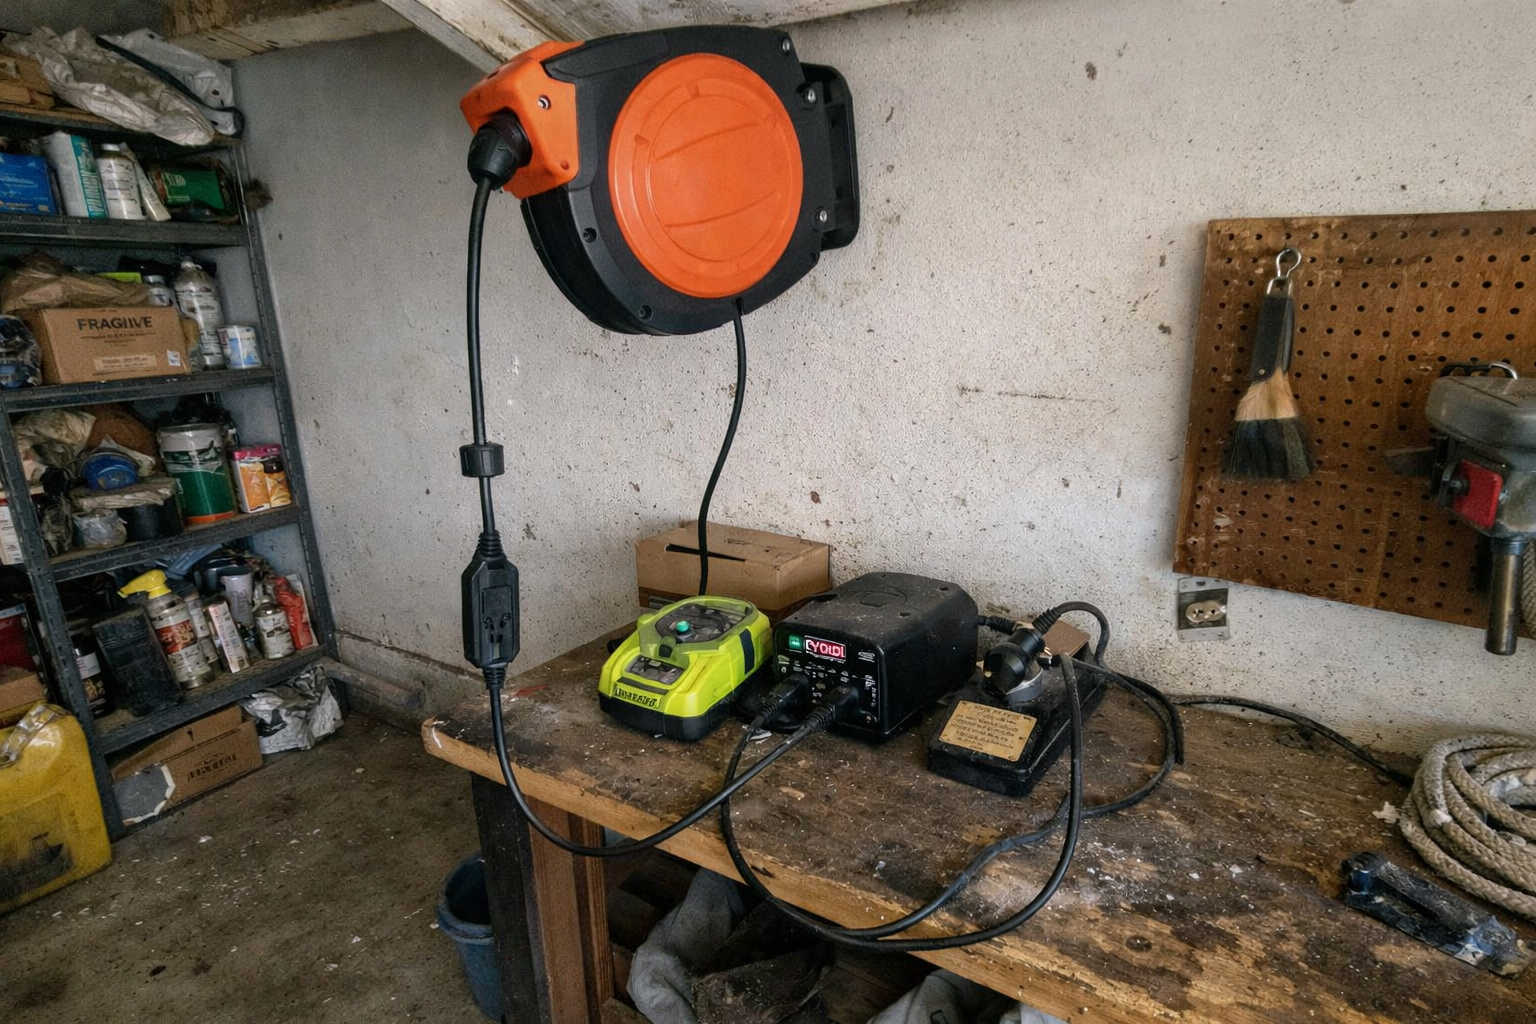
The DEWENWILS Retractable Cord Reel solved one of my most annoying garage problems: temporary power becoming permanent clutter. I mounted it so I can pull power to the bench or toward the garage door area, then let it retract when I’m done. For charging tools, running a soldering iron, powering a laptop during diagnostics, or testing gear before install, this has been a huge quality-of-life upgrade. The retracting action is a lot cleaner than keeping a loose extension cord draped over hooks.
What I Appreciate
- ✅ Keeps floor and bench area cleaner than a loose cord
- ✅ Swivel mount makes it easier to pull from different angles
- ✅ Useful for both charging and active repair work
What Frustrates Me
- ❌ Installation takes a little thought if your wall studs and outlet location are awkward
- ❌ Bigger than a basic extension cord, so you need the right mounting spot
REIBII 5-Tier Garage Shelving
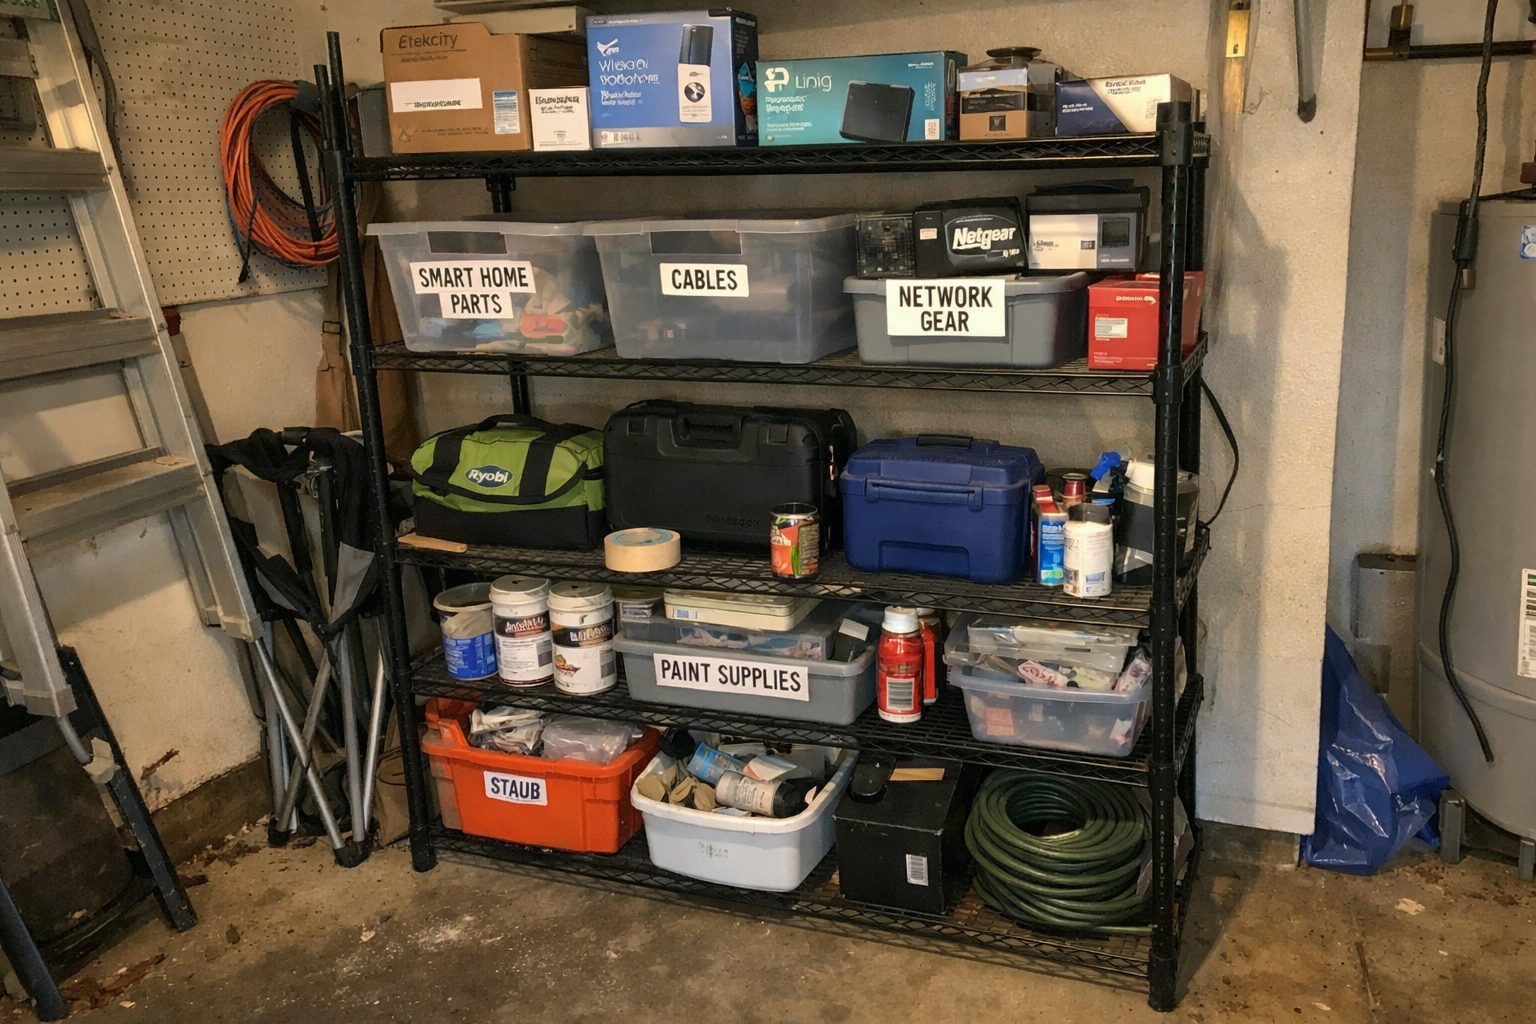
I used the REIBII 5-Tier Garage Shelving as the support structure for everything that doesn’t belong on the wall. Bulk fasteners, boxed smart switches, old routers I keep for testing, batteries, power tool cases, and leftover install materials all ended up here. This is what keeps the wall zone from getting overloaded. A wall system only works if you’re strict about what earns wall space. The shelf handles the back stock and weird-sized items that would otherwise creep onto the workbench.
What I Appreciate
- ✅ Helps separate daily-use tools from bulk storage
- ✅ Adjustable shelf heights are handy for odd-shaped gear
- ✅ Open design makes it easy to scan what you have
What Frustrates Me
- ❌ Like most garage shelving, it works best if you also use bins and labels
- ❌ MDF-style shelf surfaces are practical, but I still avoid unnecessary moisture exposure
| Part of the Setup | What It Does Best | What I Put There |
|---|---|---|
| Pegboard | Lightweight grab-and-go organization | Cable ties, testers, small tools, adapters |
| Magnetic strips | Fast access to metal hand tools | Screwdrivers, pliers, cutters, wrench |
| Cable boxes | Sorting charging and data accessories | USB cables, chargers, power bricks, adapters |
| Cord reel | Flexible power without floor clutter | Bench tools, chargers, temporary work power |
| Garage shelf | Bulk storage and overflow control | Bins, boxed parts, tool cases, supplies |
A Few Installation Lessons I Learned the Hard Way
If you’re building a garage charging station and tool storage wall, here’s the part I’d do before mounting anything: stand in front of the wall and mimic your actual work. Reach for a screwdriver. Pretend to plug in a charger. Pretend to set down a smart switch box while holding a drill. That sounds dumb, but it saved me from making the wall look organized while still being annoying to use.
- Put your most-used tools between chest and eye level.
- Keep charging gear close to an outlet or the cord reel path.
- Use the wall for daily-use items, not everything you own.
- Give cables a real home or they’ll take over the whole setup again.
- Leave some empty space because your system will grow.
I also learned not to overbuild the first version. My original instinct was to create this giant all-in-one command wall. Bad idea. The better move was keeping the wall focused and using the shelf for the overflow. That made the whole garage workshop setup easier to maintain.
What I Still Want to Improve
The next upgrade for me is better battery charging management. Right now, the zone works well for cords, handheld tools, and smart home parts, but I still want a cleaner dedicated spot for rechargeable flashlight batteries, tool battery chargers, and maybe a labeled bin just for networking testers and calibration tools. I’m also planning to add clearer labels for bins on the shelf, because once a garage system starts working, the weak point becomes everybody in the house putting random stuff near it.
That’s really the goal with any DIY garage organization setup: not perfection, just lower resistance. If the system makes it easier to start a repair, easier to finish it, and easier to put things back, it’s doing its job.
💡 The Final Verdict: Worth It If Your Garage Is Slowing You Down
Putting together a garage wall-mount charging and tool storage zone has absolutely been worth it for me. Not because it looks impressive, but because it removes the little annoyances that make DIY repairs and smart home installs take longer than they should. If you regularly work on home tech, basic electrical fixes, networking gear, or general garage projects, a simple wall system plus proper shelf storage is money well spent. If you only grab a screwdriver twice a year, you probably don’t need all of this. But if your current setup makes every project start with a scavenger hunt, this kind of upgrade pays you back in time and frustration almost immediately.
Disclaimer: As an Amazon Associate, I earn from qualifying purchases.
Author
-

Hi, I’m Andrew — an IT support specialist, smart home consultant, and someone who has spent more time than I’d probably admit fixing, upgrading, and reorganizing tech around the house.
I’m based in Seattle, and this blog grew out of years of hands-on trial and error with smart home gear, home lab setups, repair tools, and all the little accessories that make a system easier to live with. I’ve always liked understanding how things work, taking them apart when necessary, and finding better ways to set them up the second time around.
Here, I write about smart home products, DIY tech tools, server rack accessories, cable management solutions, and display gear for collectibles. Most of what I cover is practical, everyday equipment — the kind of stuff that sounds simple until you actually have to install it, troubleshoot it, or live with it for a few months.
My approach is straightforward and honest. I like step-by-step setup, real-world testing, and explaining what a product is actually like to use, not just what the box promises. That includes calling out flimsy materials, bad instructions, confusing installation, or design choices that make no sense once you start working with the product. If something is well made and easy to use, I’ll say that too.
A lot of my reviews come from real projects at home — building out servers, improving smart home automation, cleaning up cable messes, repairing devices, and figuring out better ways to store and display the things I care about.
If you like practical gear, clear explanations, and honest feedback from someone who actually installs the stuff himself, you’ll probably feel at home here.

Leave a Reply